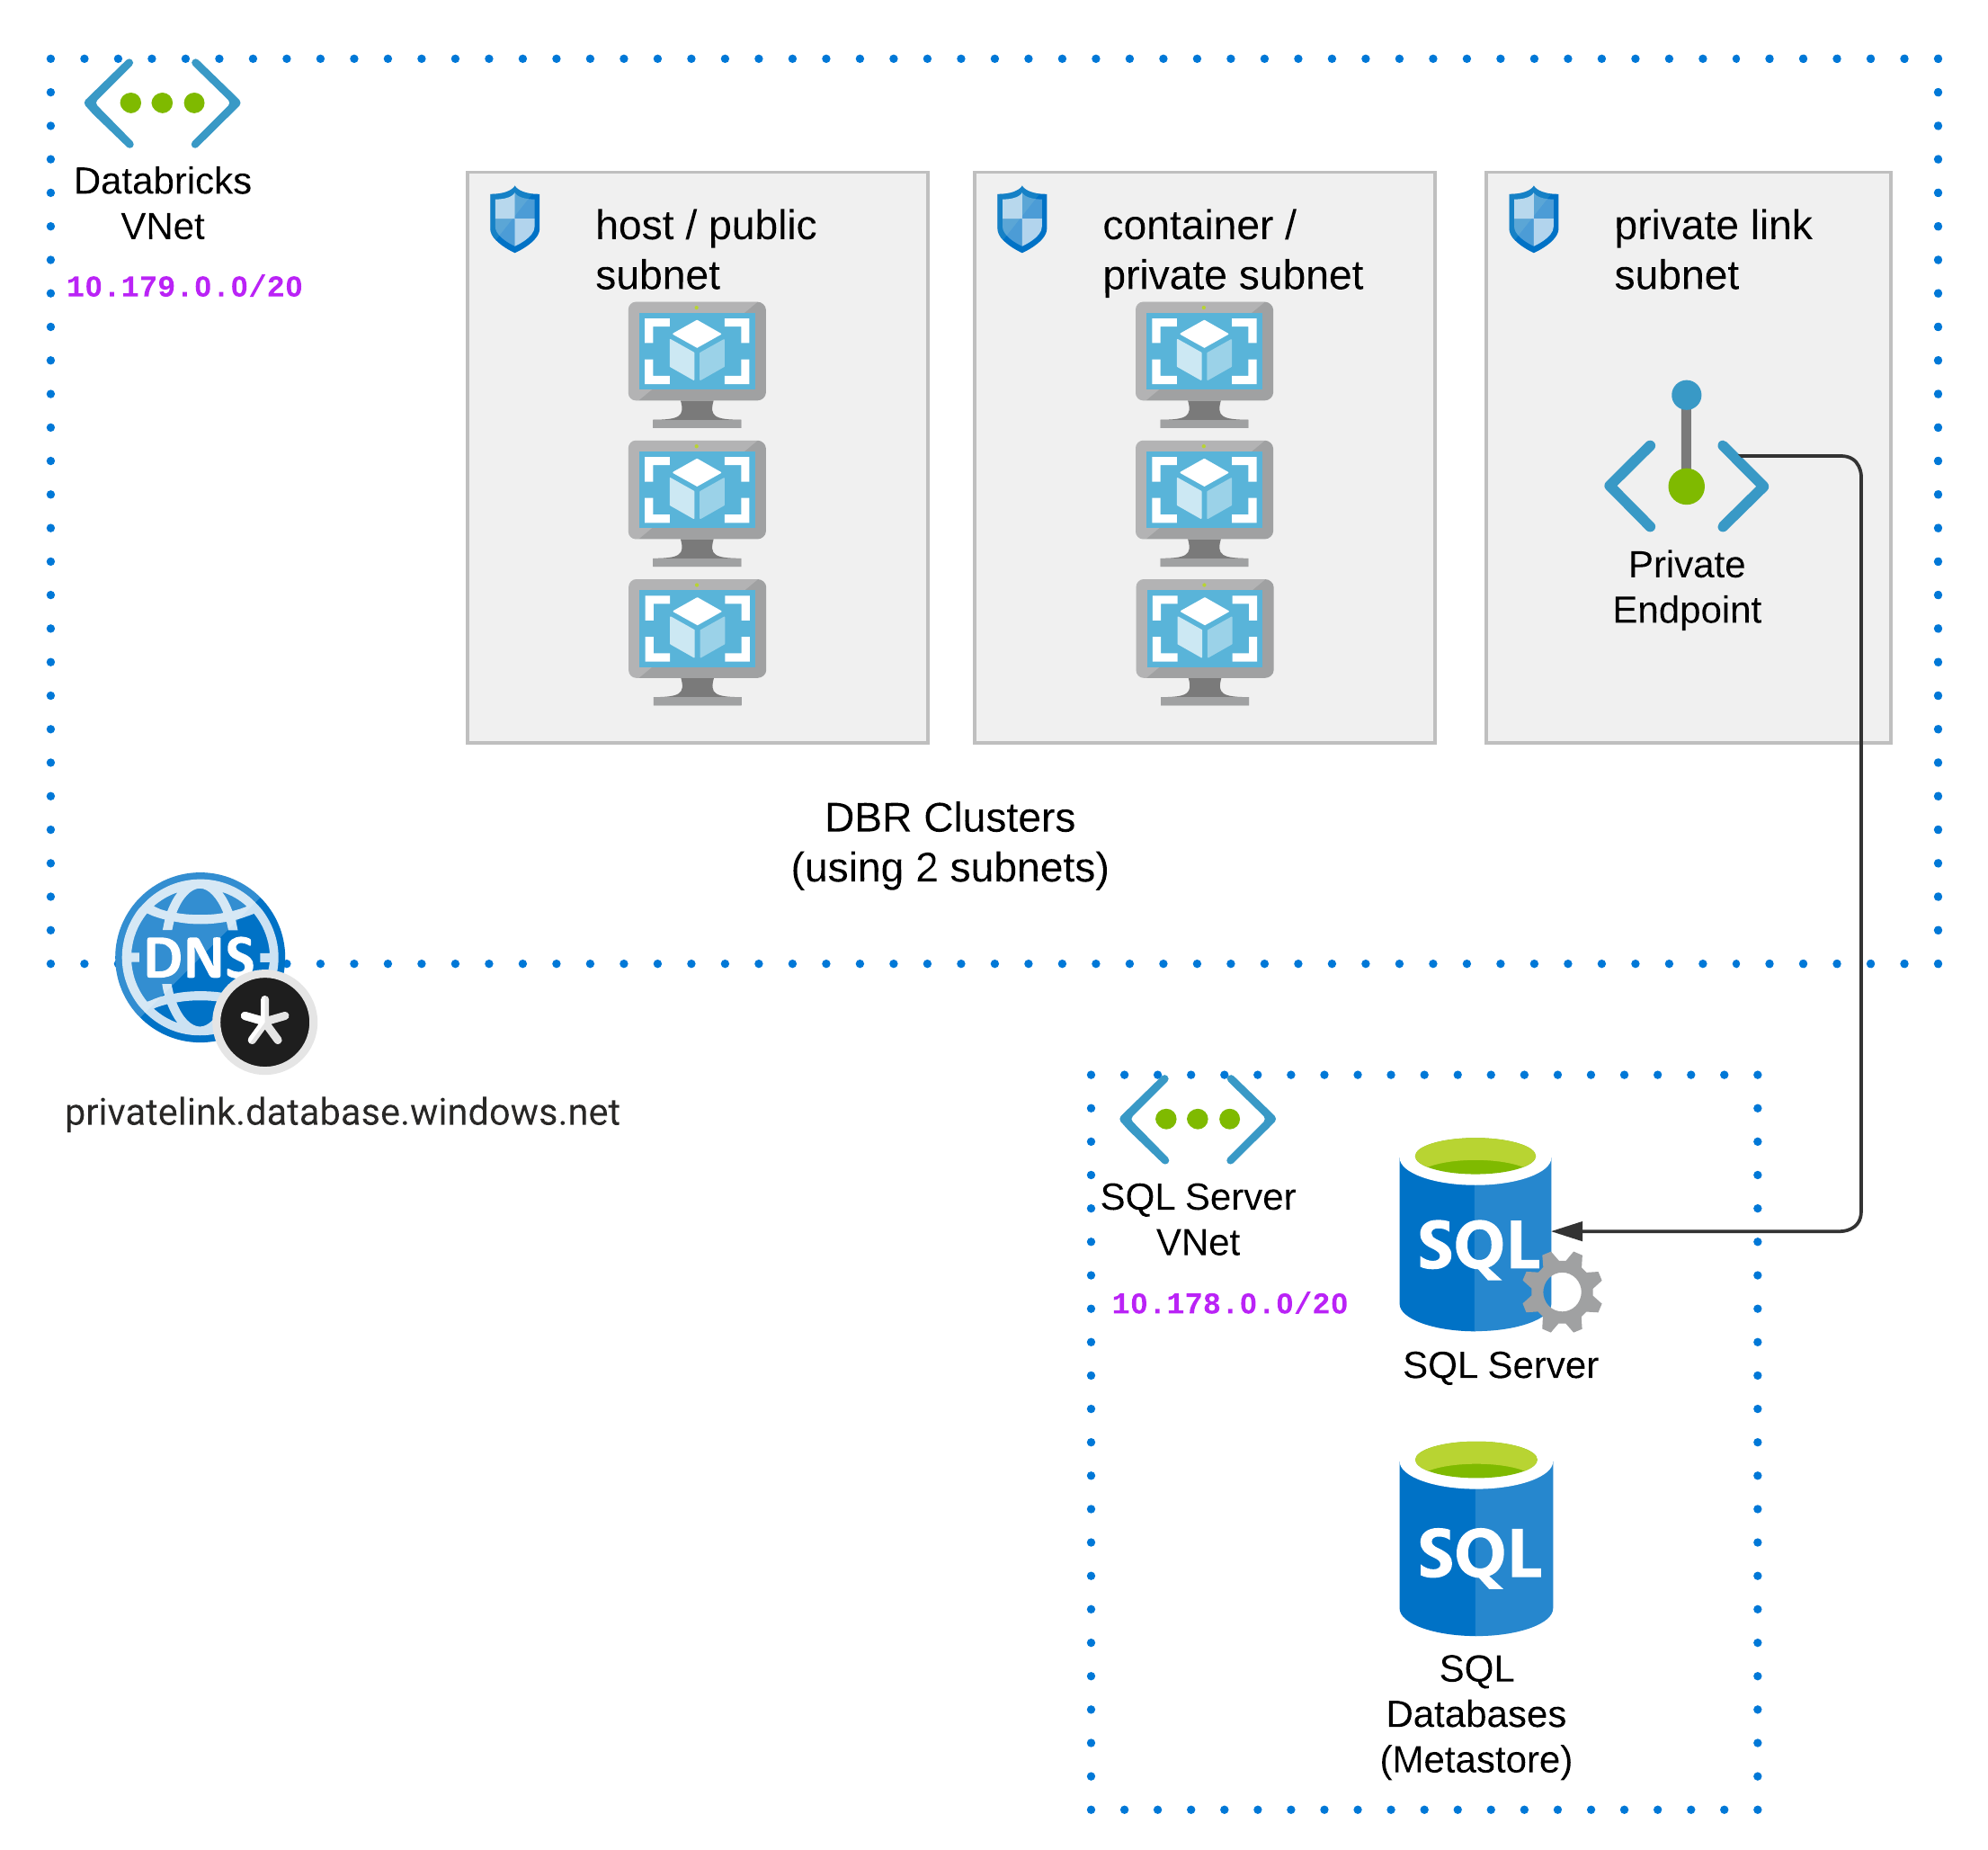
Credits to alexey.ott@databricks.com and bhavin.kukadia@databricks.com for notebook logic for database initialization steps. This architecture will be deployed:
There are 2 stages of deployment: stage 1 will deploy all the major infra components including the Databricks workspace and the sql server & database that serves as your external hive metastore. After stage 1 is complete, you need to log into your workspace (this will turn you into the first workspace admin), then you need to navigate into stage-2-workspace-objects to deploy remaining components like secret scope, cluster, job, notebook, etc. These are the workspace objects that since we are using az cli auth type with Databricks provider at workspace level, we rely on having the caller identity being inside the workspace before stage 2.
Stage 1: On your local machine:
-
Clone this repository to local.
-
Provide values to variables, some variabes will have default values defined. See inputs section below on optional/required variables.
-
For step 2, variables for db_username and db_password, you can also use your environment variables: terraform will automatically look for environment variables with name format TF_VAR_xxxxx.
export TF_VAR_db_username=yoursqlserveradminuserexport TF_VAR_db_password=yoursqlserveradminpassword -
Init terraform and apply to deploy resources:
terraform initterraform apply
After the deployment of stage 1 completes, you should have a Databricks workspace running in your own VNet, a sql server and azure sql database in another VNet, and private link connection from your Databricks VNet to your sql server.
Now we need to manually log into the Databricks workspace, such that you are added into the workspace (since you have Azure contributor role on the workspace resource, at lauch workspace time, you will be added as workspace admin). After first login, you can now proceed to stage 2.
Stage 2:
-
Navigate into
stage-2-workspace-objectsfolder. -
Configure input variables, see samples inside provided
terraform.tfvars. You can get the values from stage 1 outputs. -
Init terraform and apply to deploy resources:
terraform initterraform apply
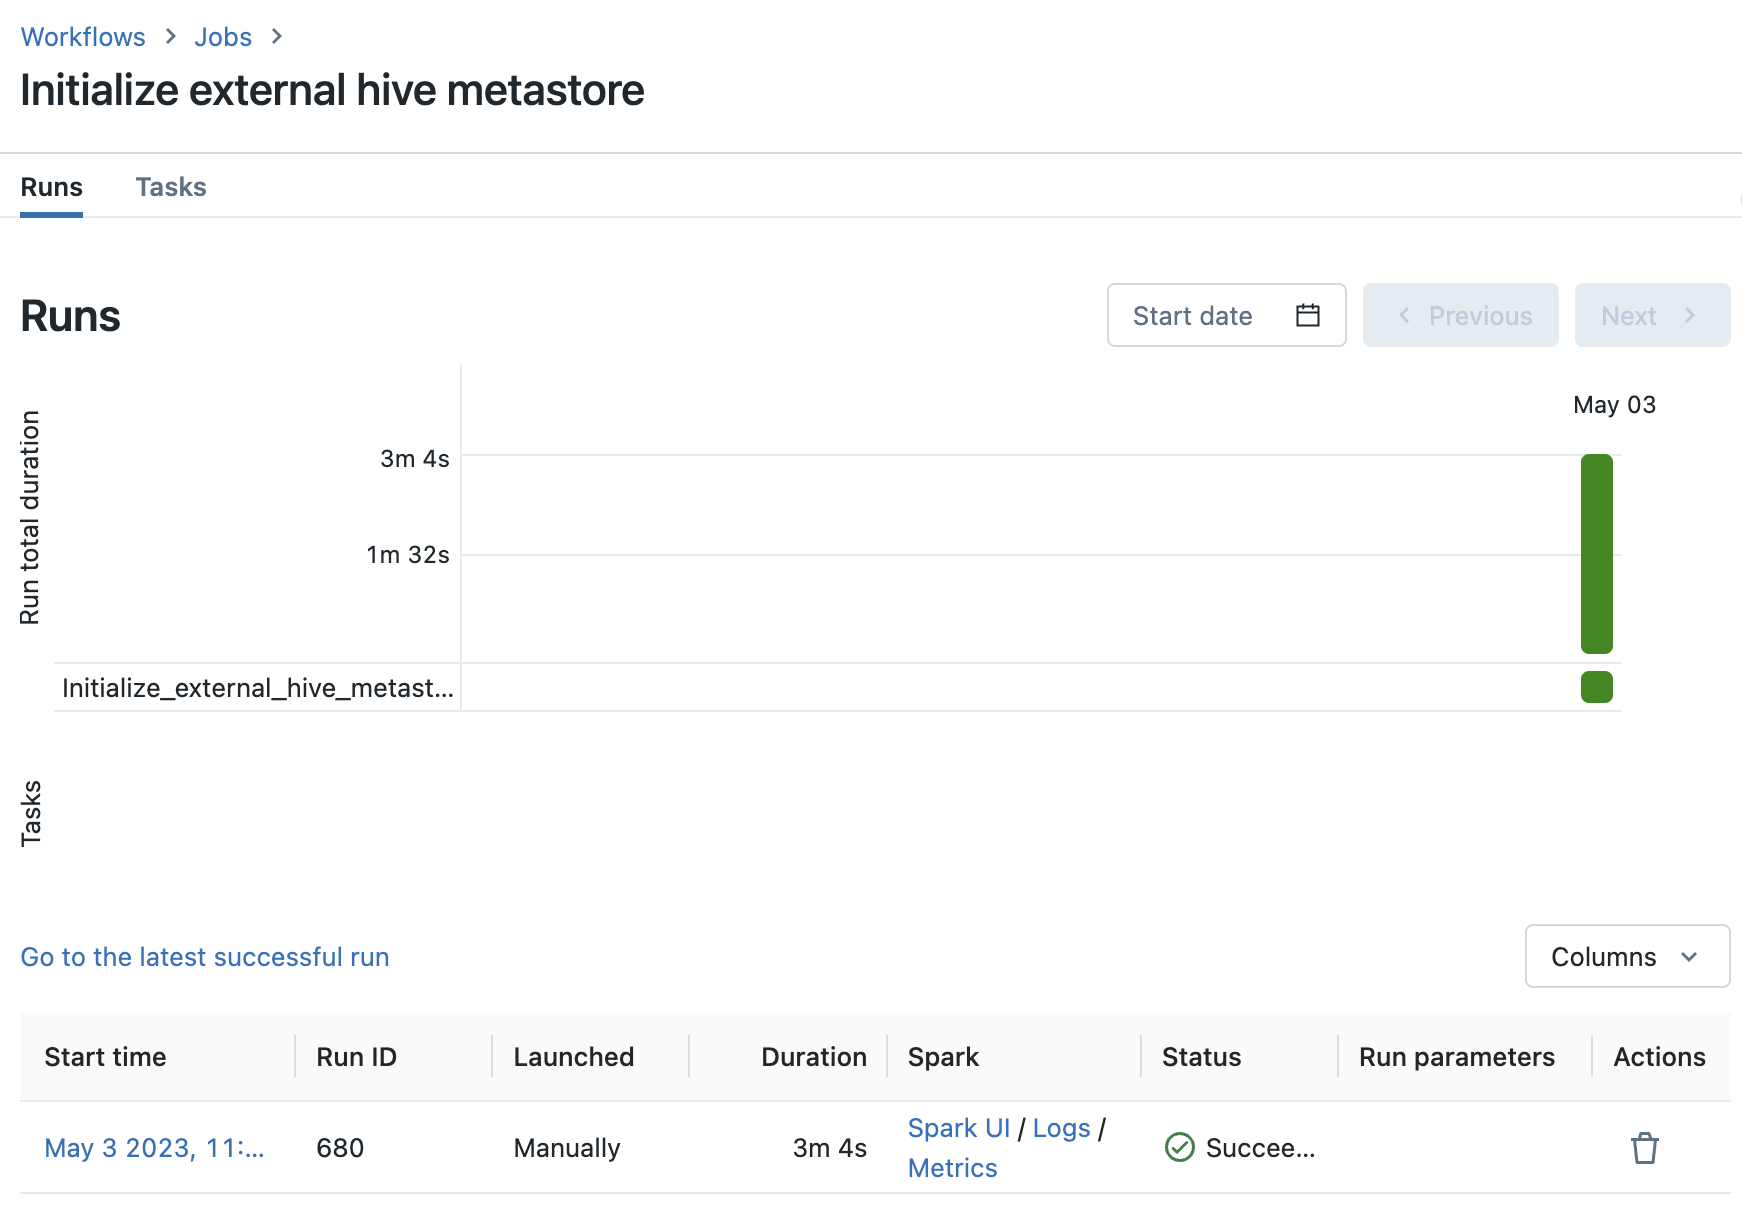
At this step, we've completes most of the work. The final step is to manually trigger the deployed job to run it only once.
Go to databricks workspace - Job - run the auto-deployed job only once; this is to initialize the database with metastore schema.
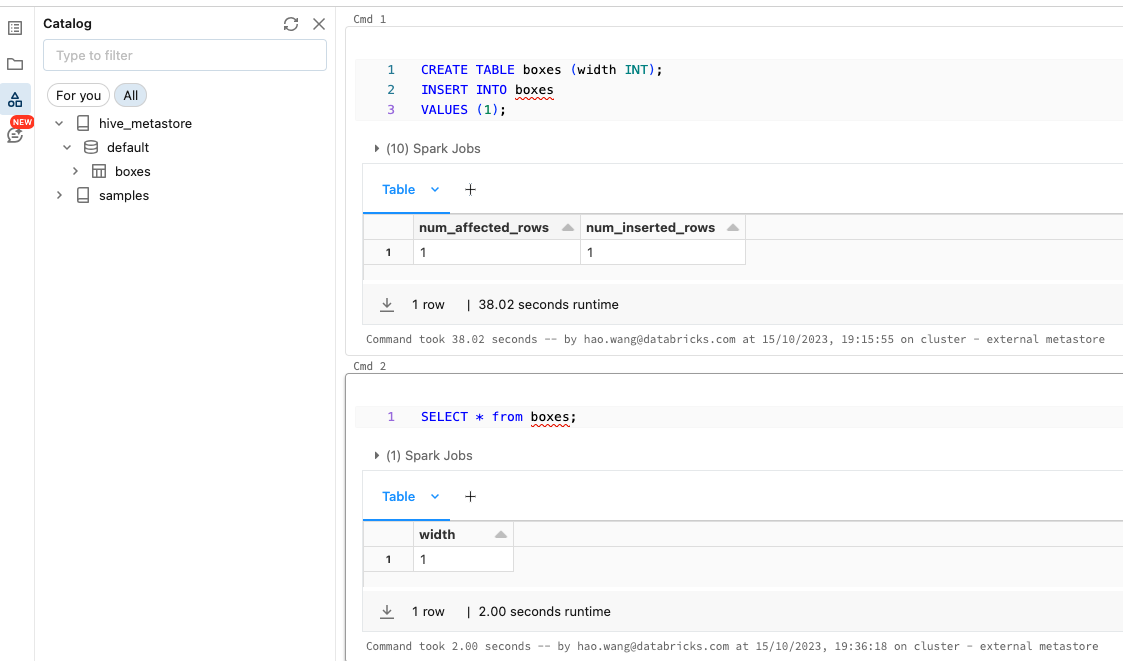
Then you can verify in a notebook:
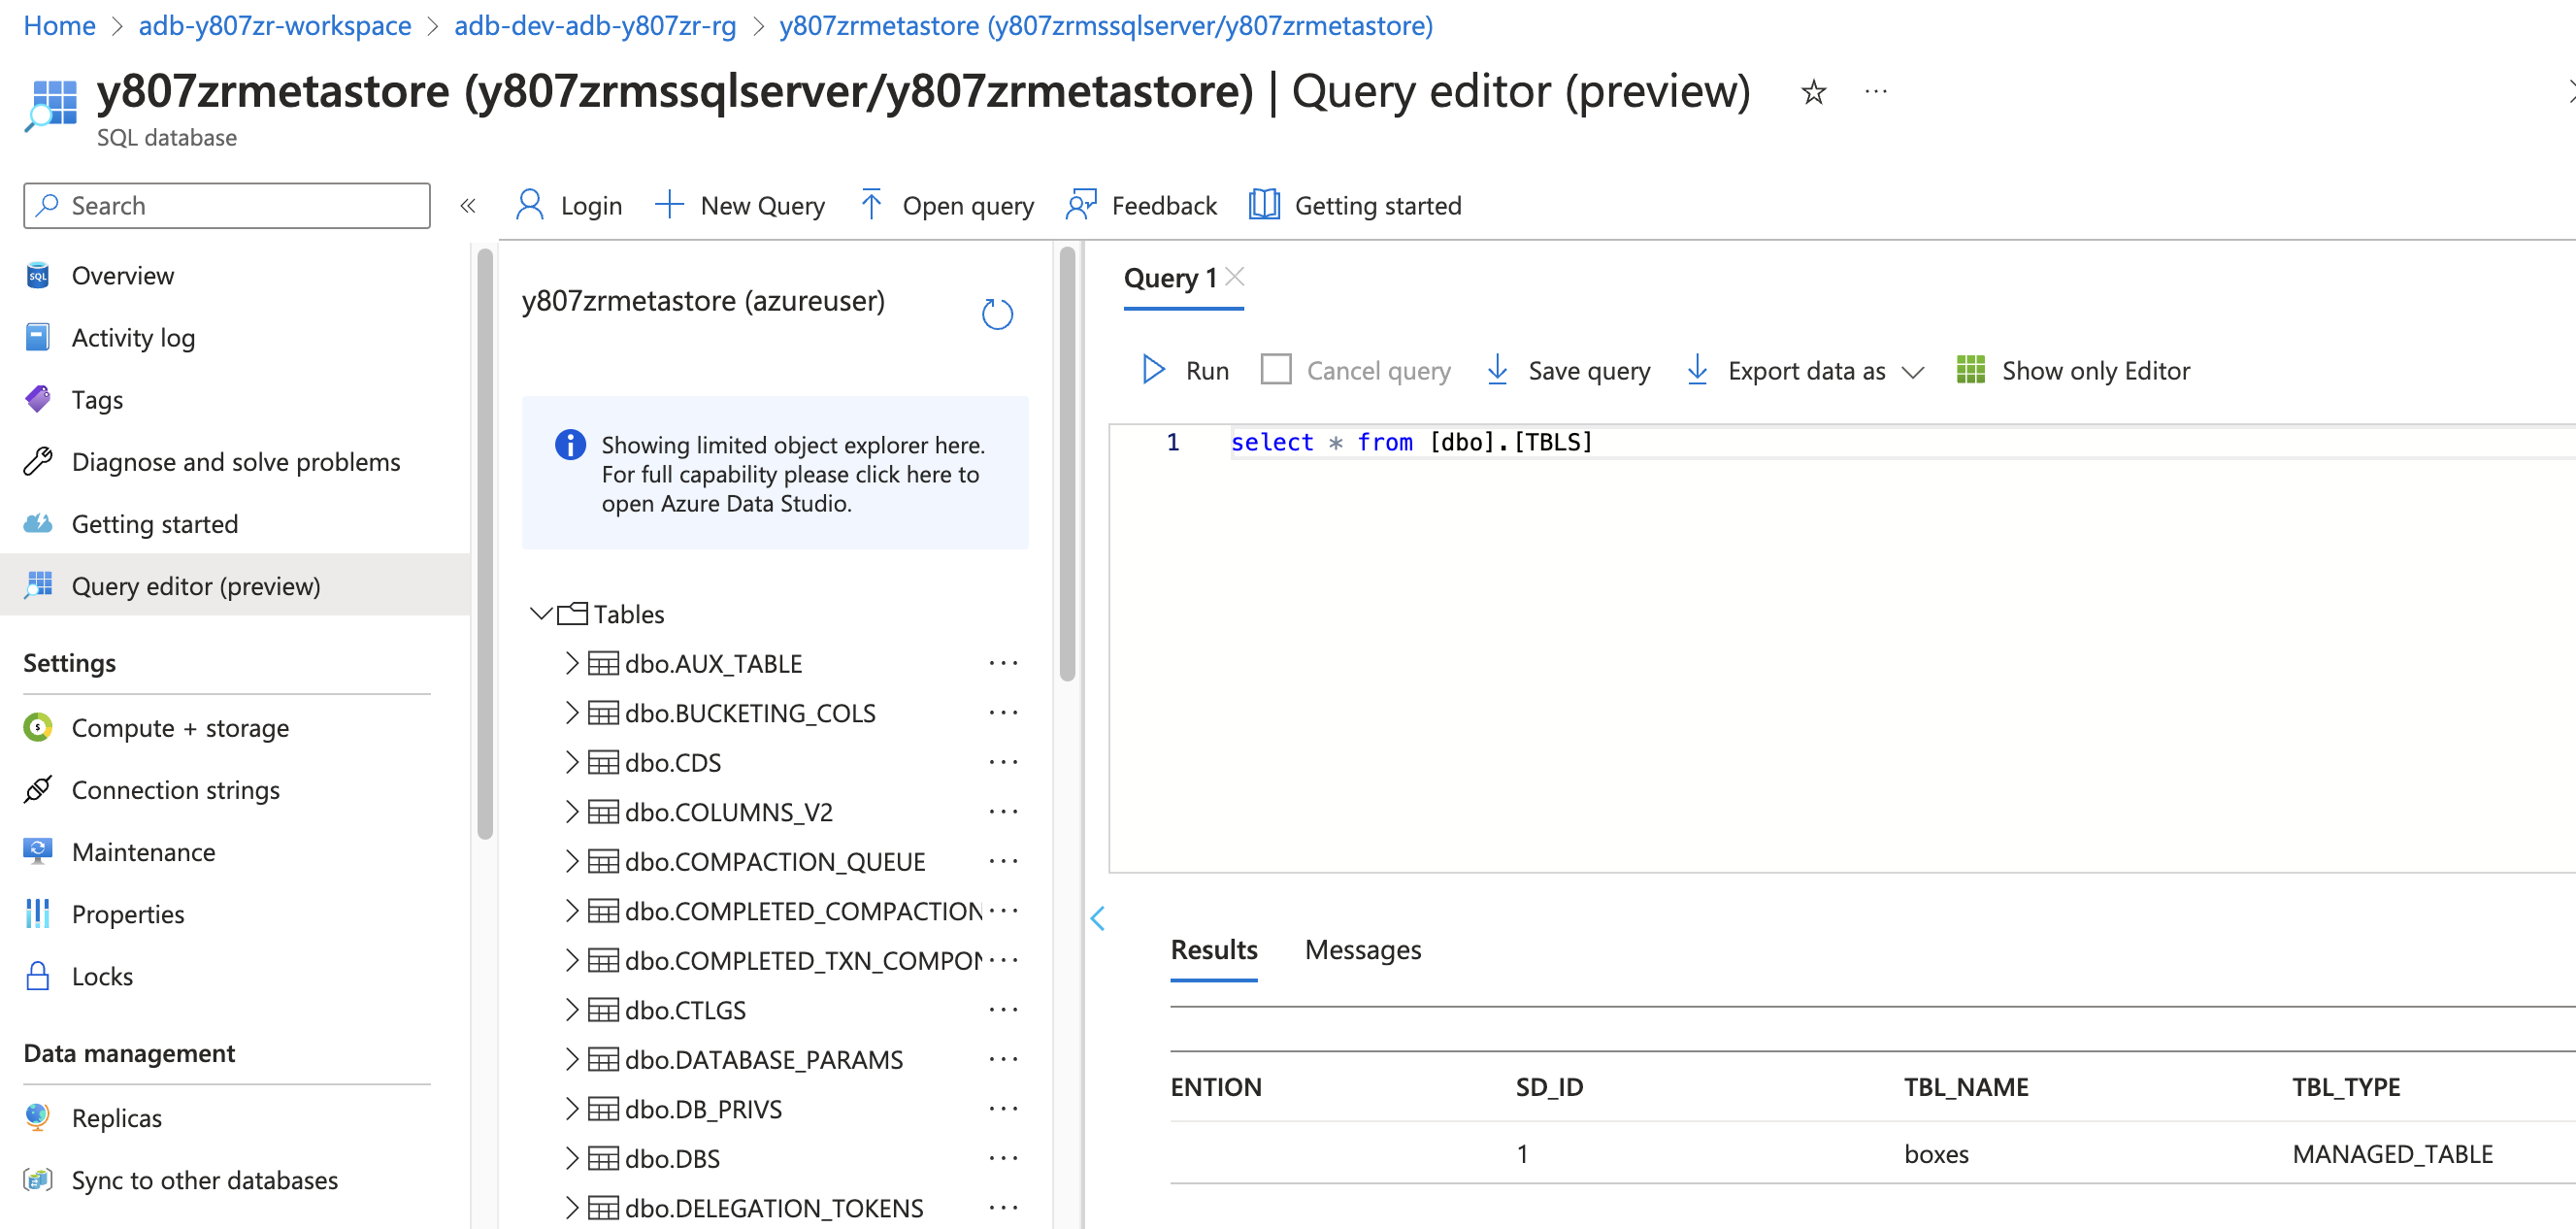
We can also check inside the sql db (metastore), we've successfully linked up cluster to external hive metastore and registered the table here:
Now you can config all other clusters to use this external metastore, using the same spark conf and env variables of cold start cluster.
Refer to tutorial: https://kb.databricks.com/metastore/create-table-ddl-for-metastore.html
dbs = spark.catalog.listDatabases()
for db in dbs:
    f = open("your_file_name_{}.ddl".format(db.name), "w")
    tables = spark.catalog.listTables(db.name)
    for t in tables:
        DDL = spark.sql("SHOW CREATE TABLE {}.{}".format(db.name, t.name))
        f.write(DDL.first()[0])
        f.write("\n")
    f.close()