- Download the Raspberry Pi Imager tool from https://www.raspberrypi.com/software/ and run it
- Device: Raspberry Pi 5
- OS: Raspberry Pi OS (64-bit)
- Storage: choose the SD device (e.g. Generic MassStorageClass Media). Check the size to verify whether that's exactly your SD
- Customisation
- Hostname: choose a name for your Pi. Here we choose
pi5, which we'll use in the following. Make sure you choose something that is unique in your local network! - Localisation: choose capital city, time zone, and keyboard layout
- User: choose your username and a password you will use to authenticate
- Choose WiFi: provide your WiFi's SSID and password
- SSH Authentication: Enable SSH, and choose whether you want to use password or public key authentication (the latter is more secure)
- Raspberry Pi Connect: Choose whether you want to use Raspberry Pi connect (we can skip this)
- Hostname: choose a name for your Pi. Here we choose
- Write the image onto the SD card (the process takes a while: depending on the SD card speed, it can take up to 30' just for writing).
- Make sure your cable is the correct size: the camera cable usually sold with the v1.3 cameras works with Raspberry Pi models older than 5. The cable you have in your Raspberry Pi 5 kit should be the right one: you can verify that checking that one of the two ends of the cable is smaller than the other.

- If there's already a cable connected to your camera and it's the wrong one, you first have to disconnect it. To do that, you need to unlock the latch that keeps the camera in place (see figure).

- Connect the ribbon cable on one side (the larger one) to the camera, on the other side to the Raspberry Pi. The connectors on the Pi are two and the pictures below show you how to unlatch one and connect a cable to it.


- Once everything is connected, you are ready to boot your Pi (perhaps the Raspberry Pi Imager has completed writing the SD card) and test the camera

The Pi might take some time for its first boot. If you see the green led blink continuously, that's a good sign! It means the disk is being accessed, so the Pi did not hang.
If the network has been properly configured, you should be able to verify when the Pi is available by "pinging" its local address. When you configured the OS image, you provided a name for your Pi. Now, if you open a terminal and run the ping command as follows, you will see some Request timeout messages as long as the Pi is not reachable, then some valid answers (64 bytes from ...) when it becomes accessible. You can stop the ping program from running by hitting CTRL+C (or CMD+C on a Mac).
# ping the_name_of_your_pi.local, for example
ping pi5.local

% ping pi5.local
PING pi5.local (192.168.1.130): 56 data bytes
Request timeout for icmp_seq 0
Request timeout for icmp_seq 1
64 bytes from 192.168.1.130: icmp_seq=0 ttl=64 time=2473.892 ms
64 bytes from 192.168.1.130: icmp_seq=1 ttl=64 time=1465.934 ms
64 bytes from 192.168.1.130: icmp_seq=2 ttl=64 time=463.014 ms
64 bytes from 192.168.1.130: icmp_seq=3 ttl=64 time=16.665 ms
64 bytes from 192.168.1.130: icmp_seq=4 ttl=64 time=21.282 ms
64 bytes from 192.168.1.130: icmp_seq=5 ttl=64 time=14.934 ms
^C
--- pi5.local ping statistics ---
6 packets transmitted, 6 packets received, 0.0% packet loss
round-trip min/avg/max/stddev = 14.934/742.620/2473.892/928.756 ms
If you have enabled SSH access, you can connect to your Pi using the following command:
ssh your_username@pi5.local
If you have chosen password authentication, enter your password. If you have provided a public key instead, you will just need to confirm the validity of your key the first time you connect.
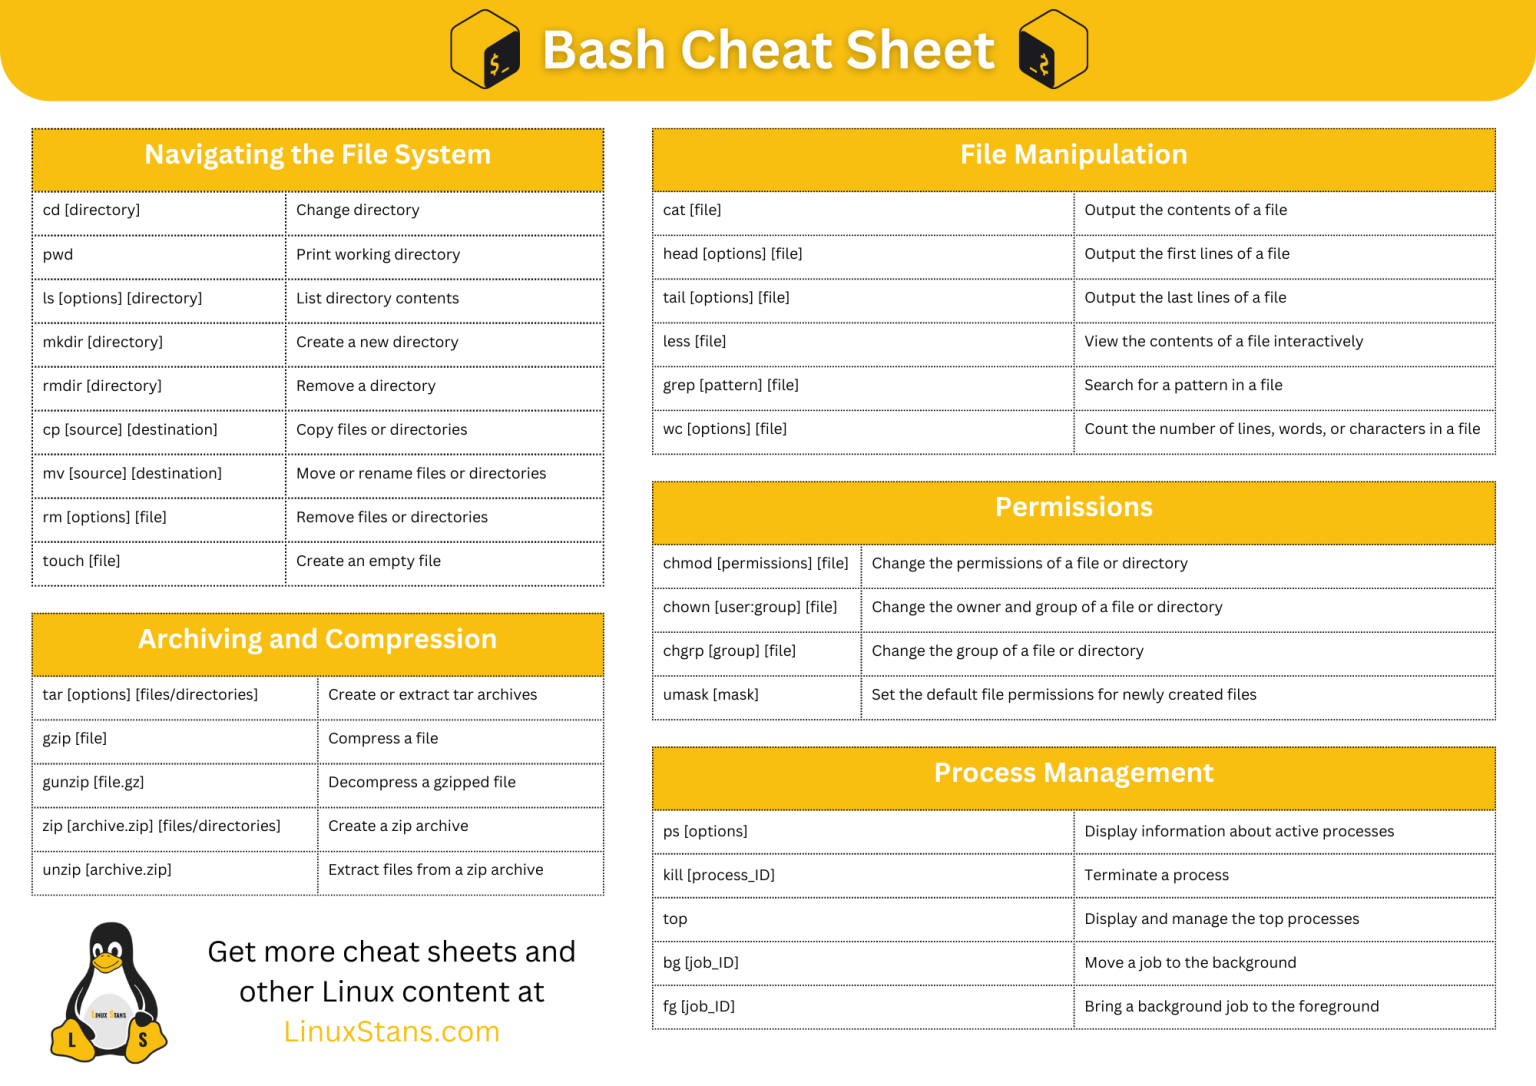
From here on, you are in! When you connect remotely to the Pi via SSH, you will always start in your home directory (whose path is /home/your_username). You can verify that by entering the command pwd at the prompt. You can list the contents of a directory by writing ls (or ls -l to see the contents of the directory as a listing). You can enter a directory to another by typing cd directory_name and you can go back to the parent directory with cd ... For more commands, here's a cheatsheet for you.
Raspbian (the Operating System running on your Pi) has a tool, called raspi-config, that you can use to choose even more settings. Here we will configure the following:
- Interface Options
- VNC: this is a protocol that allows you to export your Raspberry Pi's screen via network. Enable this so you can connect and test the camera live
- Localisation options: this is optional, but in case the default keyboard settings do not work properly with your current setup, you can change them here
As an extra step, let us make sure that you are running the latest version of the OS:
# make sure you are running an updated version of the OS
sudo apt-get update
sudo apt-get upgrade
sudo apt install -y python3-picamera2

# (hit Y or Enter to continue)
Now that you have an up-to-date OS and VNC configured, you should be able to connect to it remotely via VNC too. The pictures below show how this looks like when you connect via TigerVNC, and open source VNC client that runs on linux and Mac via brew. Any VNC client should work though, so feel free to try the one that you are most comfortable with. Provide the .local address to connect to, and your credentials to log in. The Raspbian UI will greet you inside the VNC window!


Now, open a terminal (click on the corresponding icon on the menu bar at the top) and type:
rpicam-hello
If your camera has been connected properly, you should be able to briefly see it work in a new window. That's it! You probably won't have to connect again to the Pi via VNC for this session, but you can do that whenever you want to check what's available on the OS, install new applications, directly use a text editor or a coding IDE on the Pi, etc.
The Rock-Paper-Scissors experiment comes with code we have shared in this repo (check out its README.md file to familiarise with it). The code we are interested in is in the rps directory. You can clone the repo with:
git clone https://github.com/mozilla-ai/tumo.git
cd tumo/rps
Install uv:
curl -LsSf https://astral.sh/uv/install.sh | sh
source $HOME/.local/bin/env # (sh, bash, zsh)
export UV_PYTHON_PREFERENCE=only-system         # use the system Python, don't download one
uv venv --python /usr/bin/python3 --system-site-packages   # /usr/bin/python3 = whatever the Pi ships
uv sync
uv run python detect_live.py
uv run python play.py
For more documentation about the code, check the YOLO.md document.