Here is guide to deploy the Google Maps Extractor on AWS EC2, although same can work on any cloud provider like Google Cloud, Azure, or DigitalOcean. Just Ensure the VM has Debian/Ubuntu-based OS.
First, we'll reserve an Elastic IP address. An Elastic IP ensures your EC2 instance is always reachable at the same IP address.
-
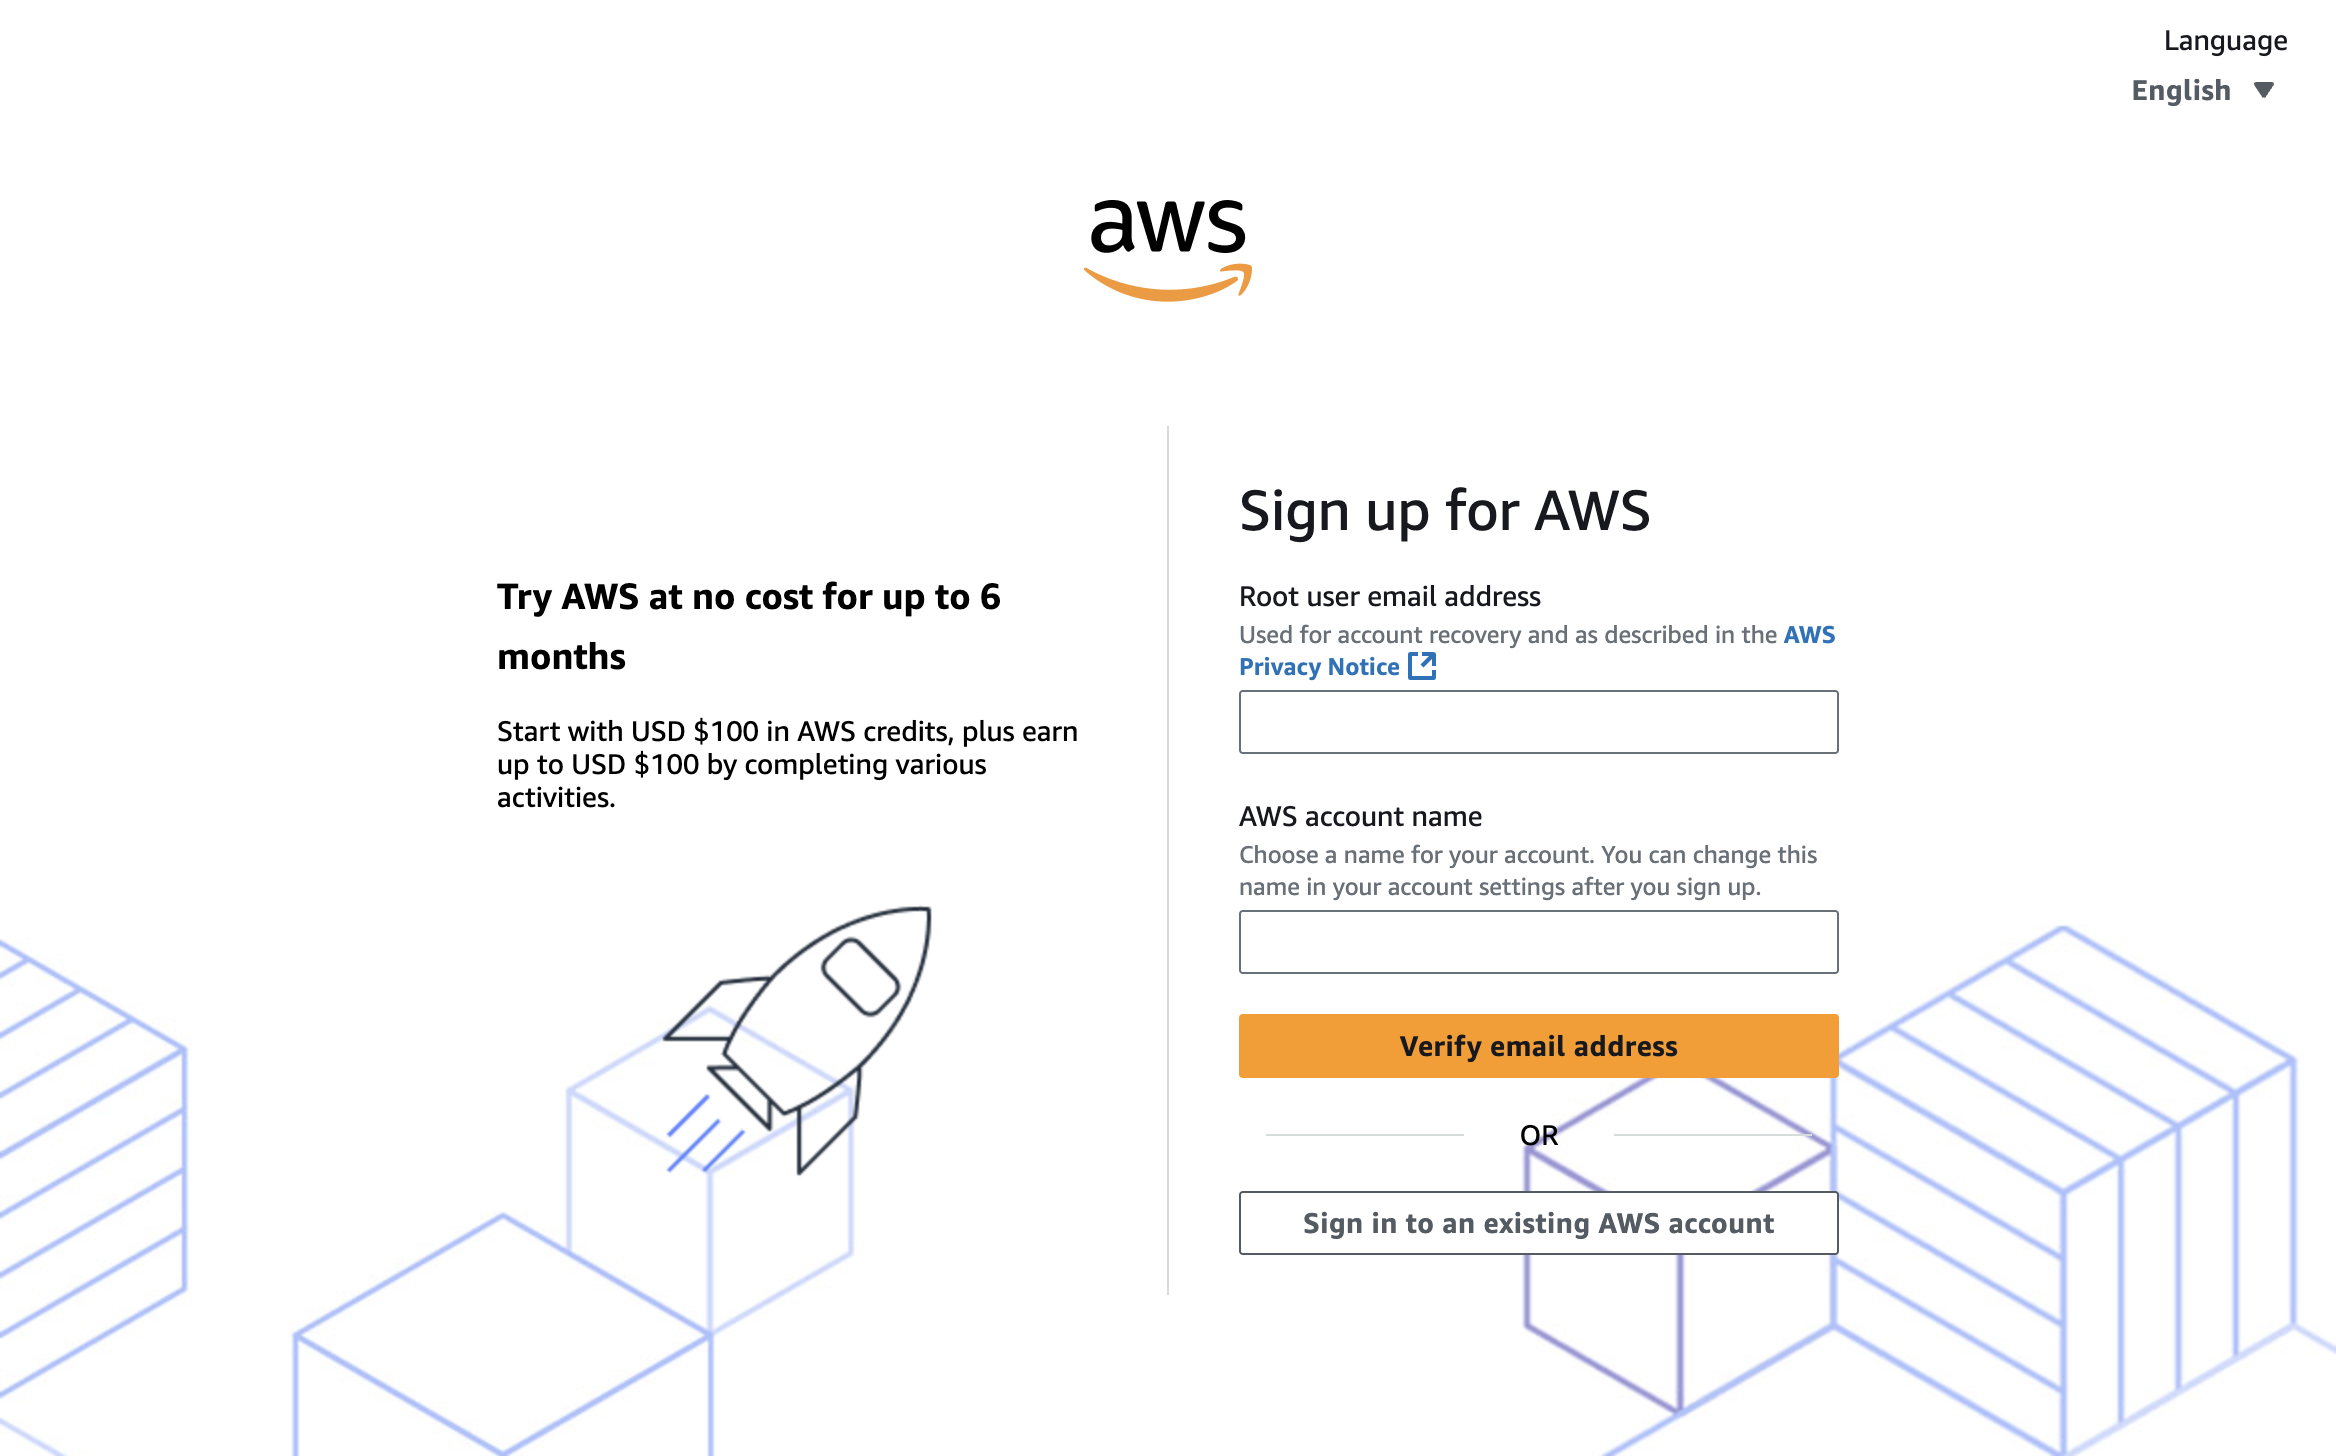
Create an AWS Account if you don't already have one.
-
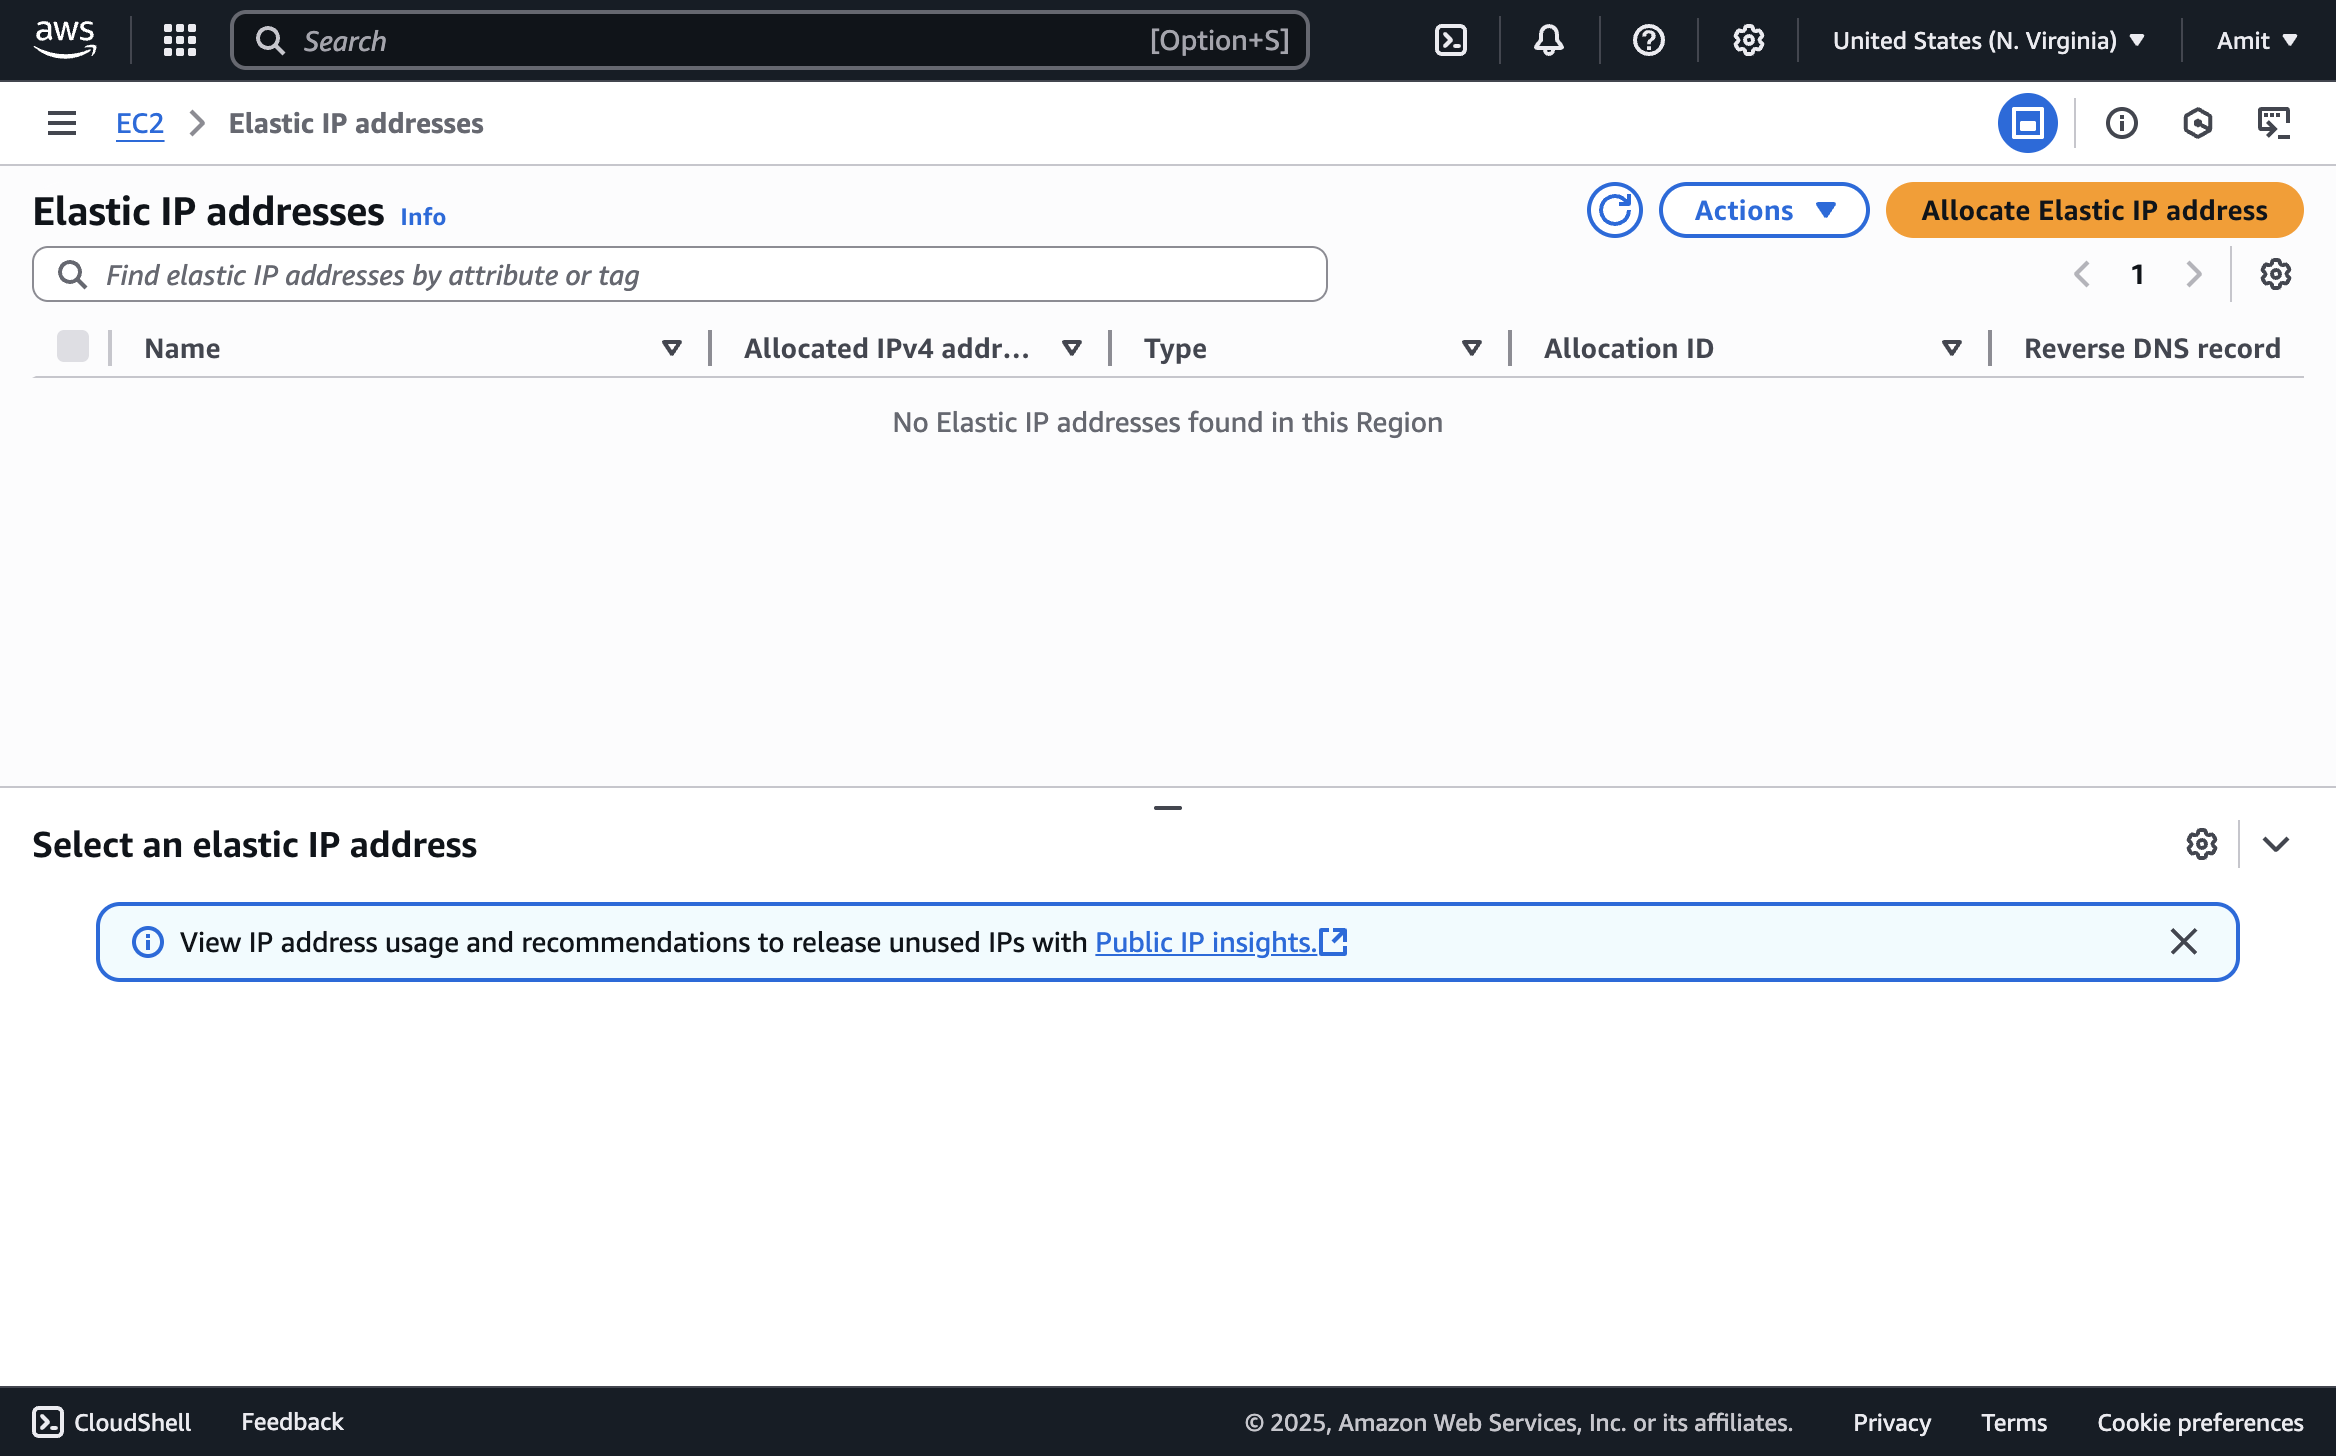
Go to the Elastic IP addresses page.
-
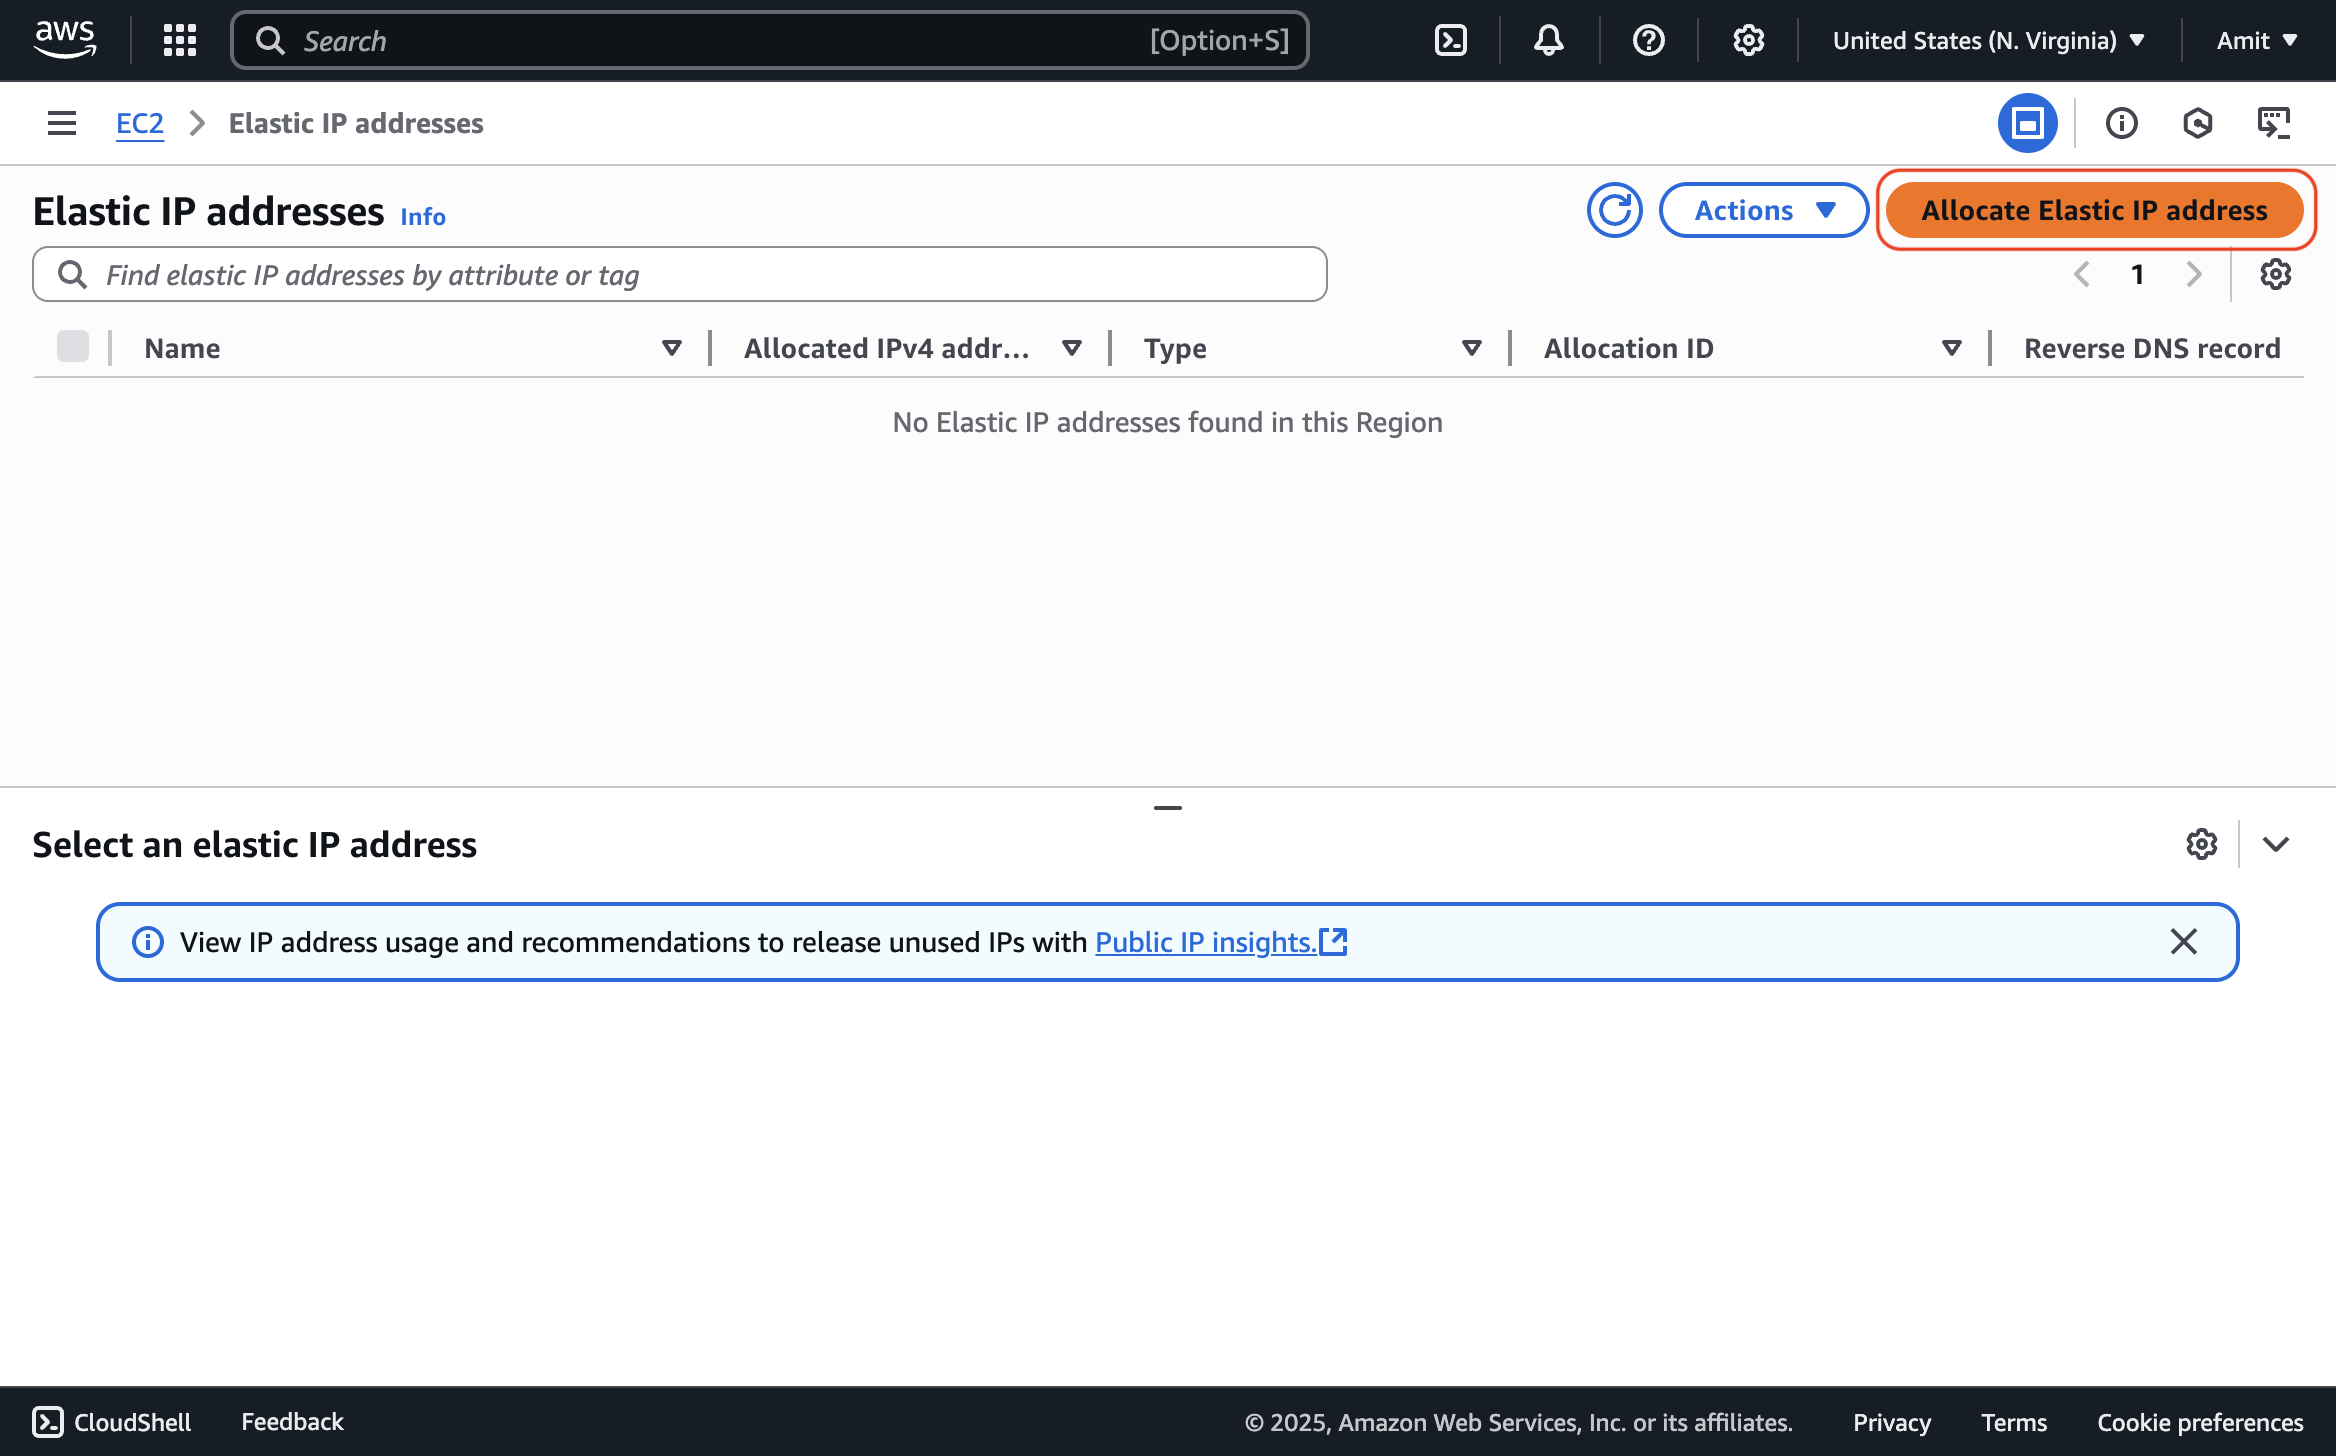
Click the "Allocate Elastic IP address" button.
-
Keep the default settings and click "Allocate"
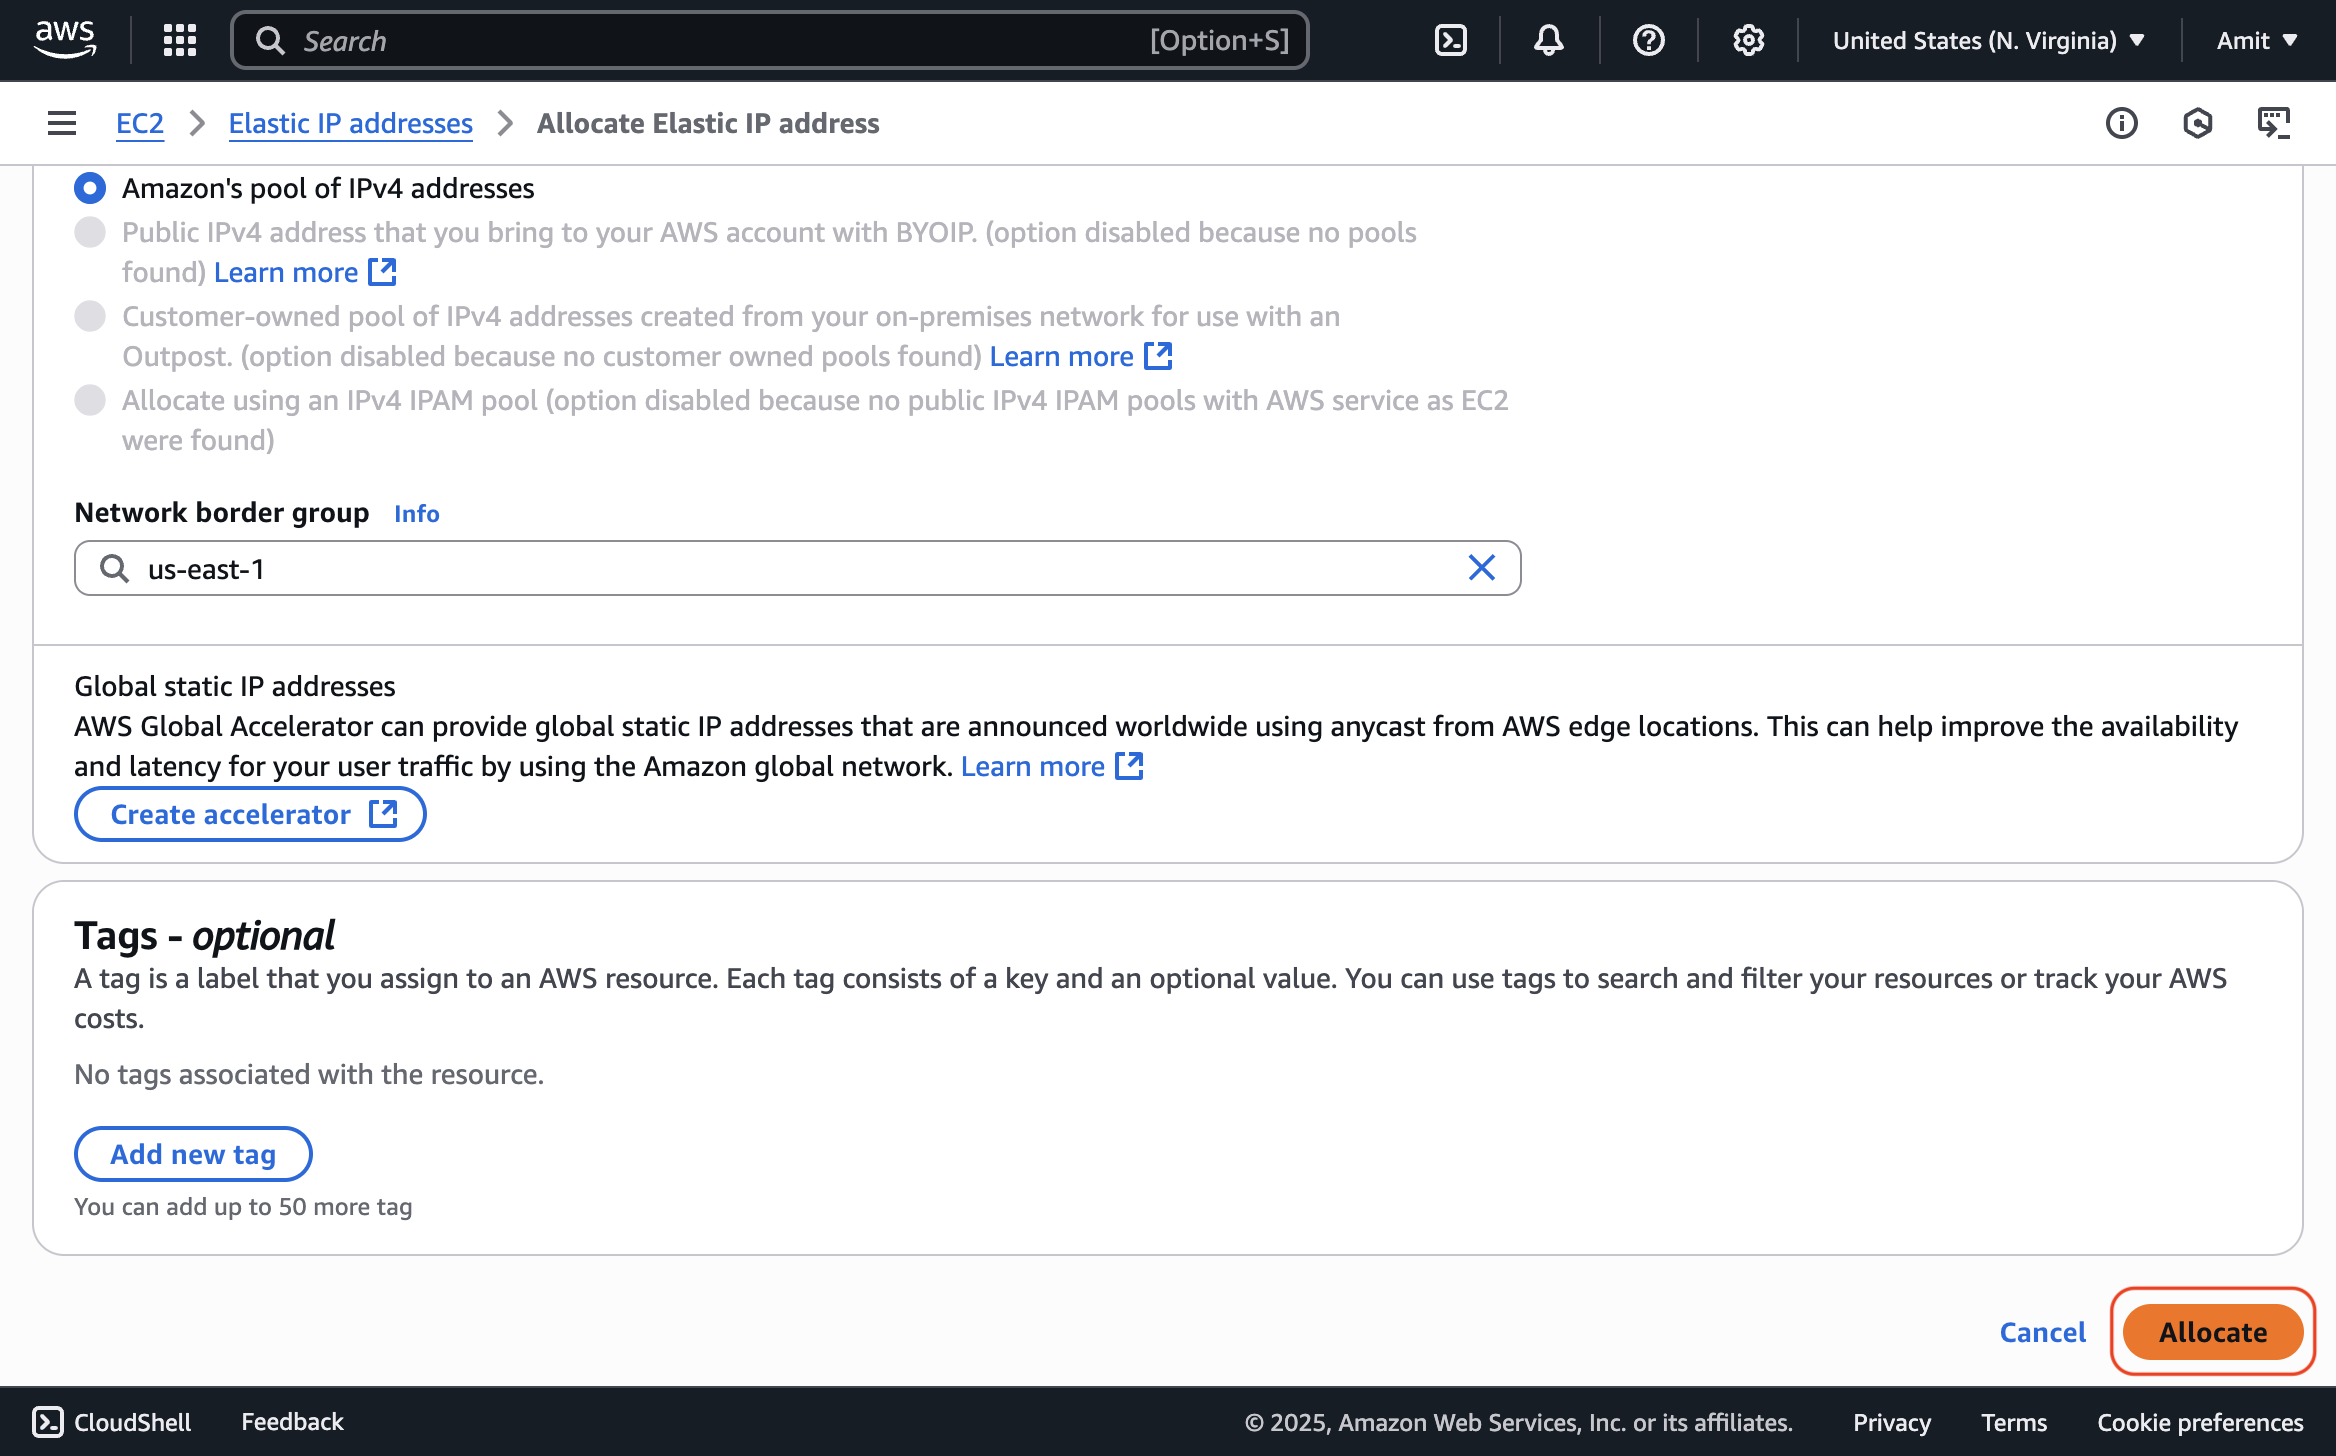
This creates an Elastic IP address that you'll use to access your app. You will assign this IP to your EC2 instance in the next step.
-
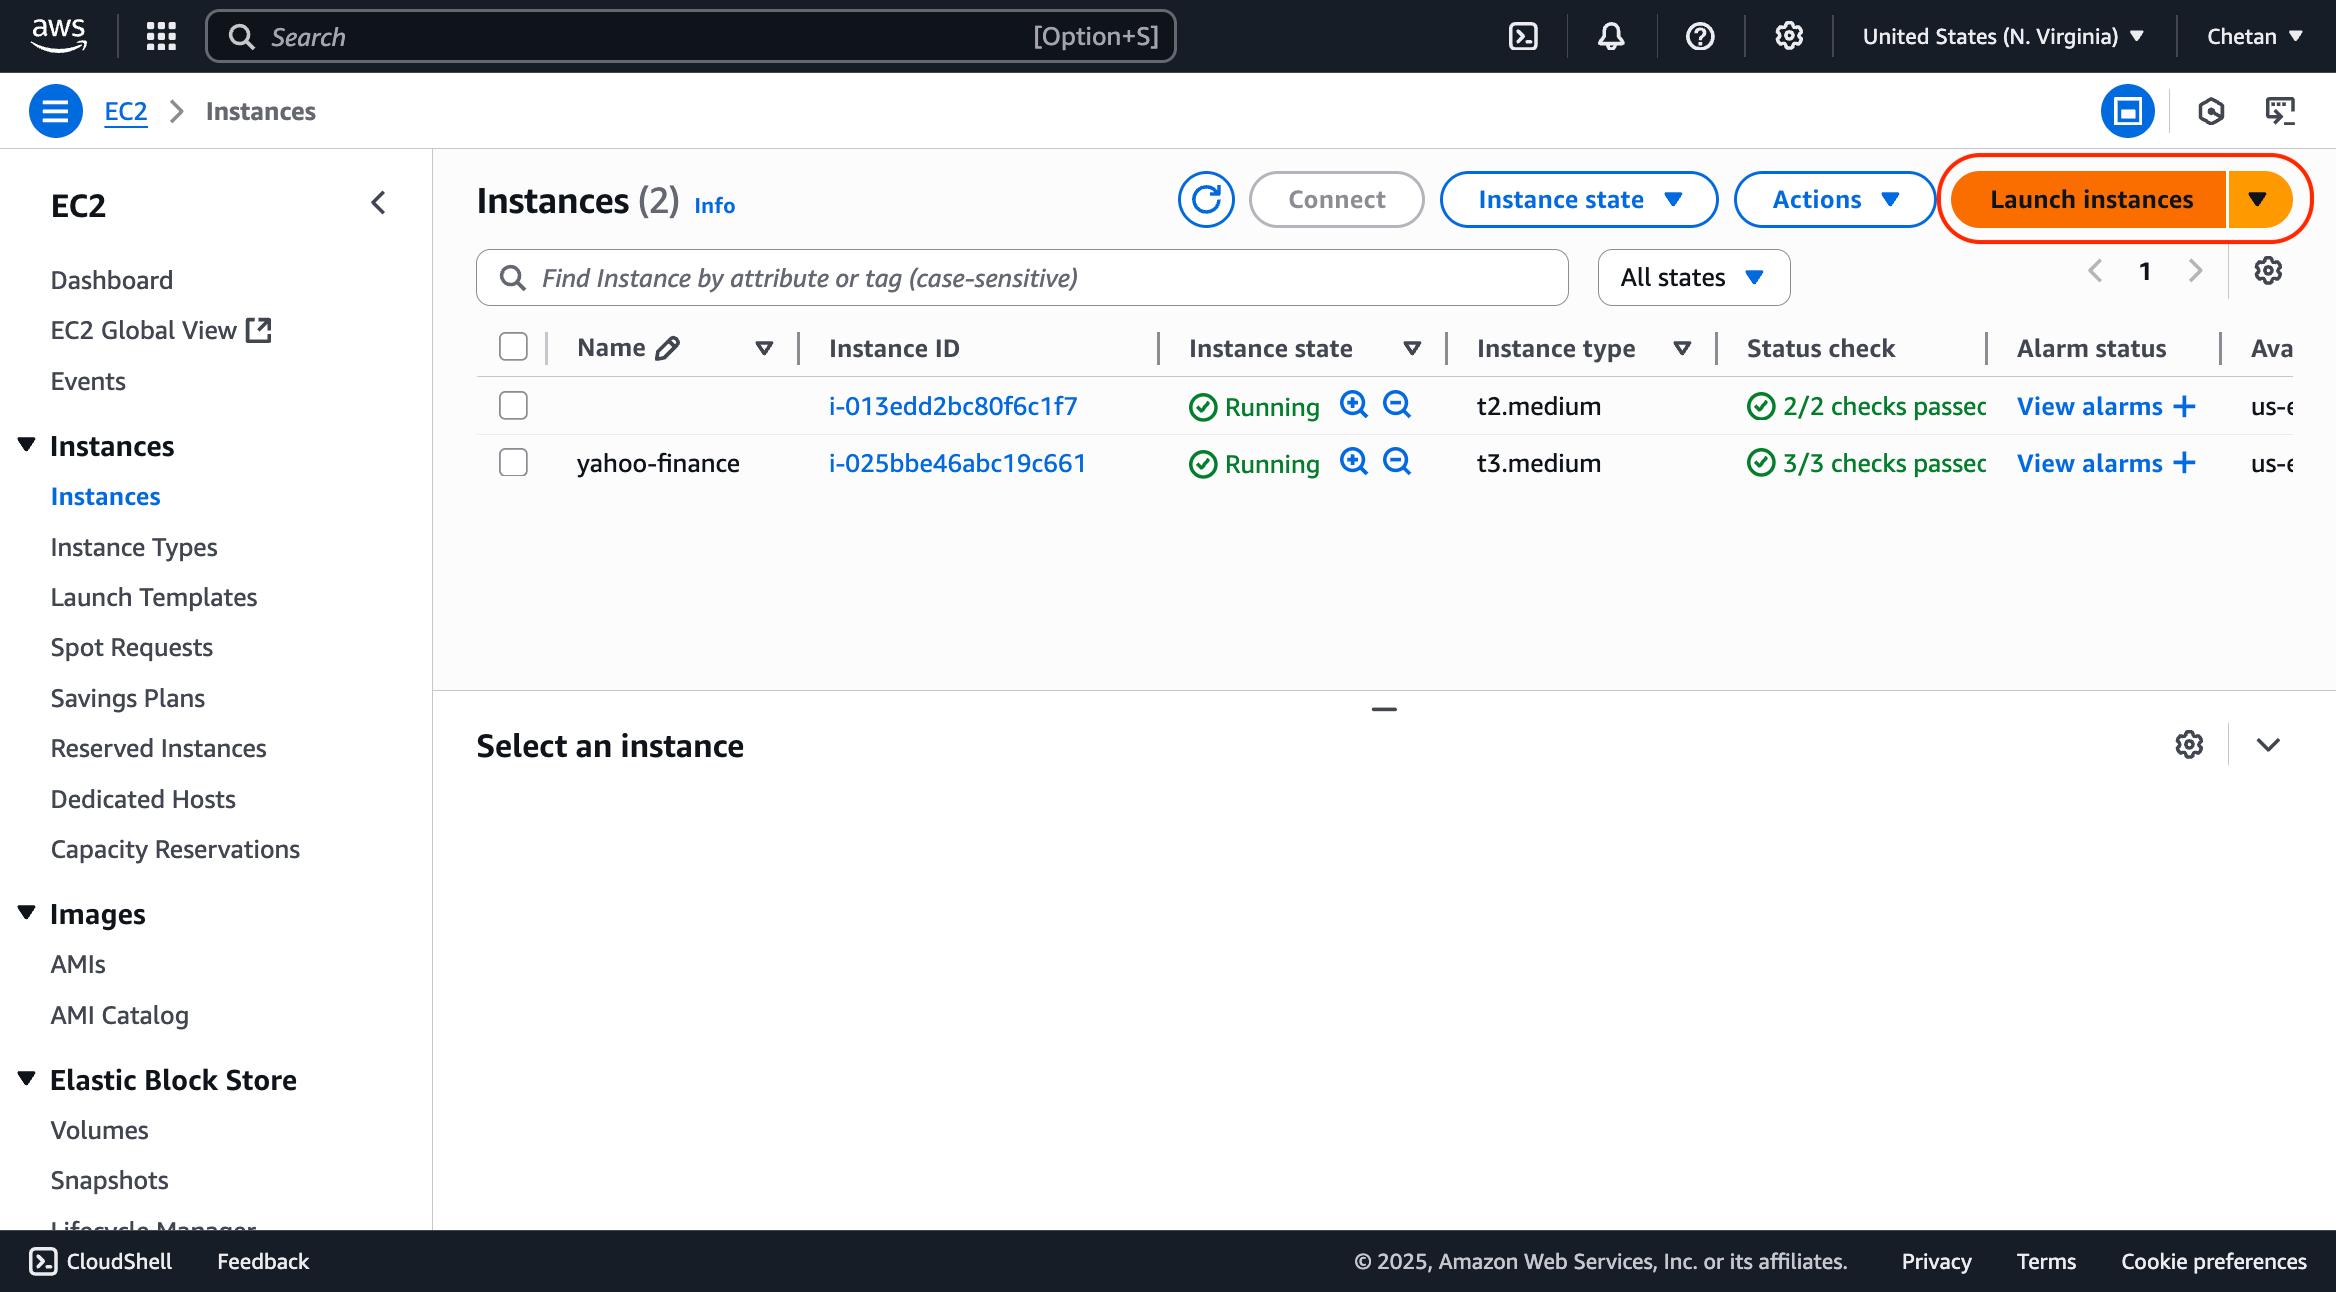
Go to the EC2 Dashboard and click "Launch Instance"
-
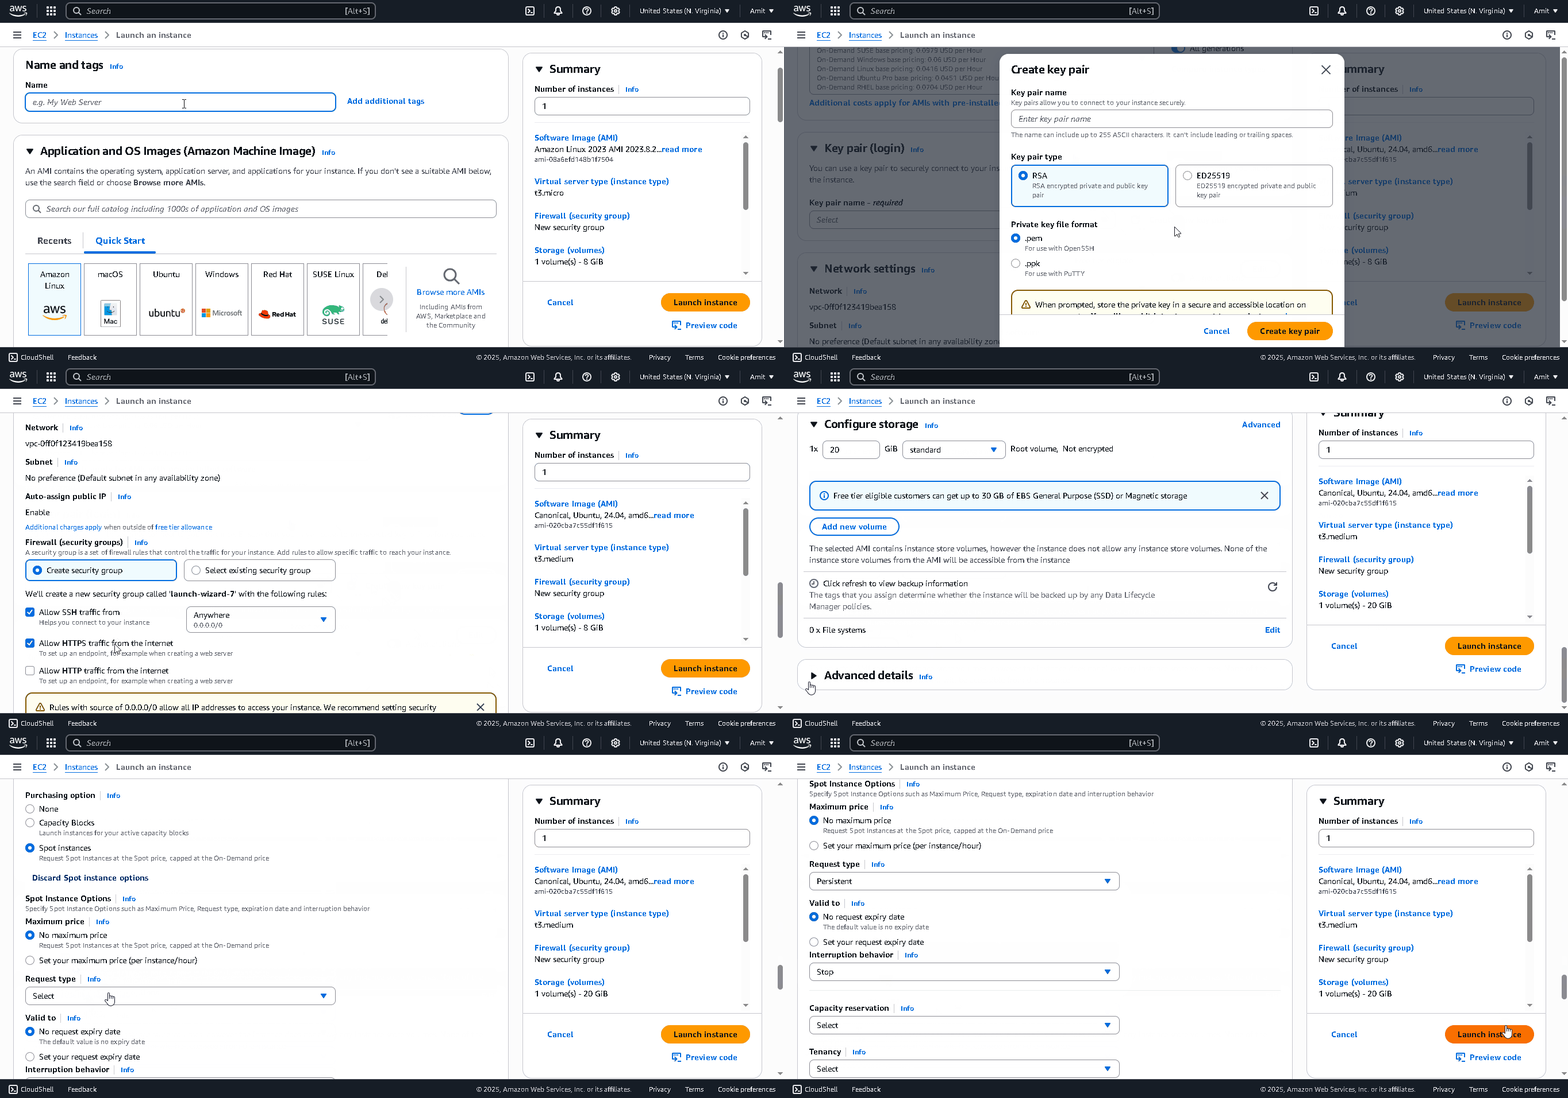
Configure your instance with these recommended settings. You may change the Machine Type and Boot Disk Size based on your scraping needs:
- Name and tags
- Name:
gmaps
- Name:
- Application and OS Images (AMI)
- Amazon Machine Image (AMI):
Ubuntu Server 24.04 LTS - Note: A
.debinstaller requires a Debian-based OS like Ubuntu.
- Amazon Machine Image (AMI):
- Instance type
- Instance type:
t3.medium - Note: 2 vCPU, 4 GB memory. Change based on needs.
- Instance type:
- Key pair (login)
- Key pair name:
Create new key pair > RSA (.pem) - Note: Required for SSH access.
- Key pair name:
- Network settings
- Allow SSH traffic from: ✓
- Note: Required for terminal access.
- Allow HTTP traffic from the internet: ✓
- Note: Required for accessing API via HTTP.
- Allow HTTPS traffic from the internet: ✓
- Note: Required for accessing API via HTTPS.
- Configure storage
- Storage:
80 GiB - Magnetic - Note: Magnetic is the cheapest disk type.
- Storage:
- Name and tags
-
If you're scraping data for your own needs, enable Spot Instances as they are 70-90% cheaper than On-Demand instances. Enable them with these settings:
- Advanced details
- Purchasing option:
Spot Instances - Note: Enables Spot Instances.
- Purchasing option:
- Customize Spot instance options
- Request type:
Persistent - Interruption behavior:
Stop
- Request type:
- Advanced details
Don't use Spot VMs for customer-facing APIs or mission-critical applications, as they can be stopped by AWS at any time if the resources are needed elsewhere.
-
Click Launch instance.
-
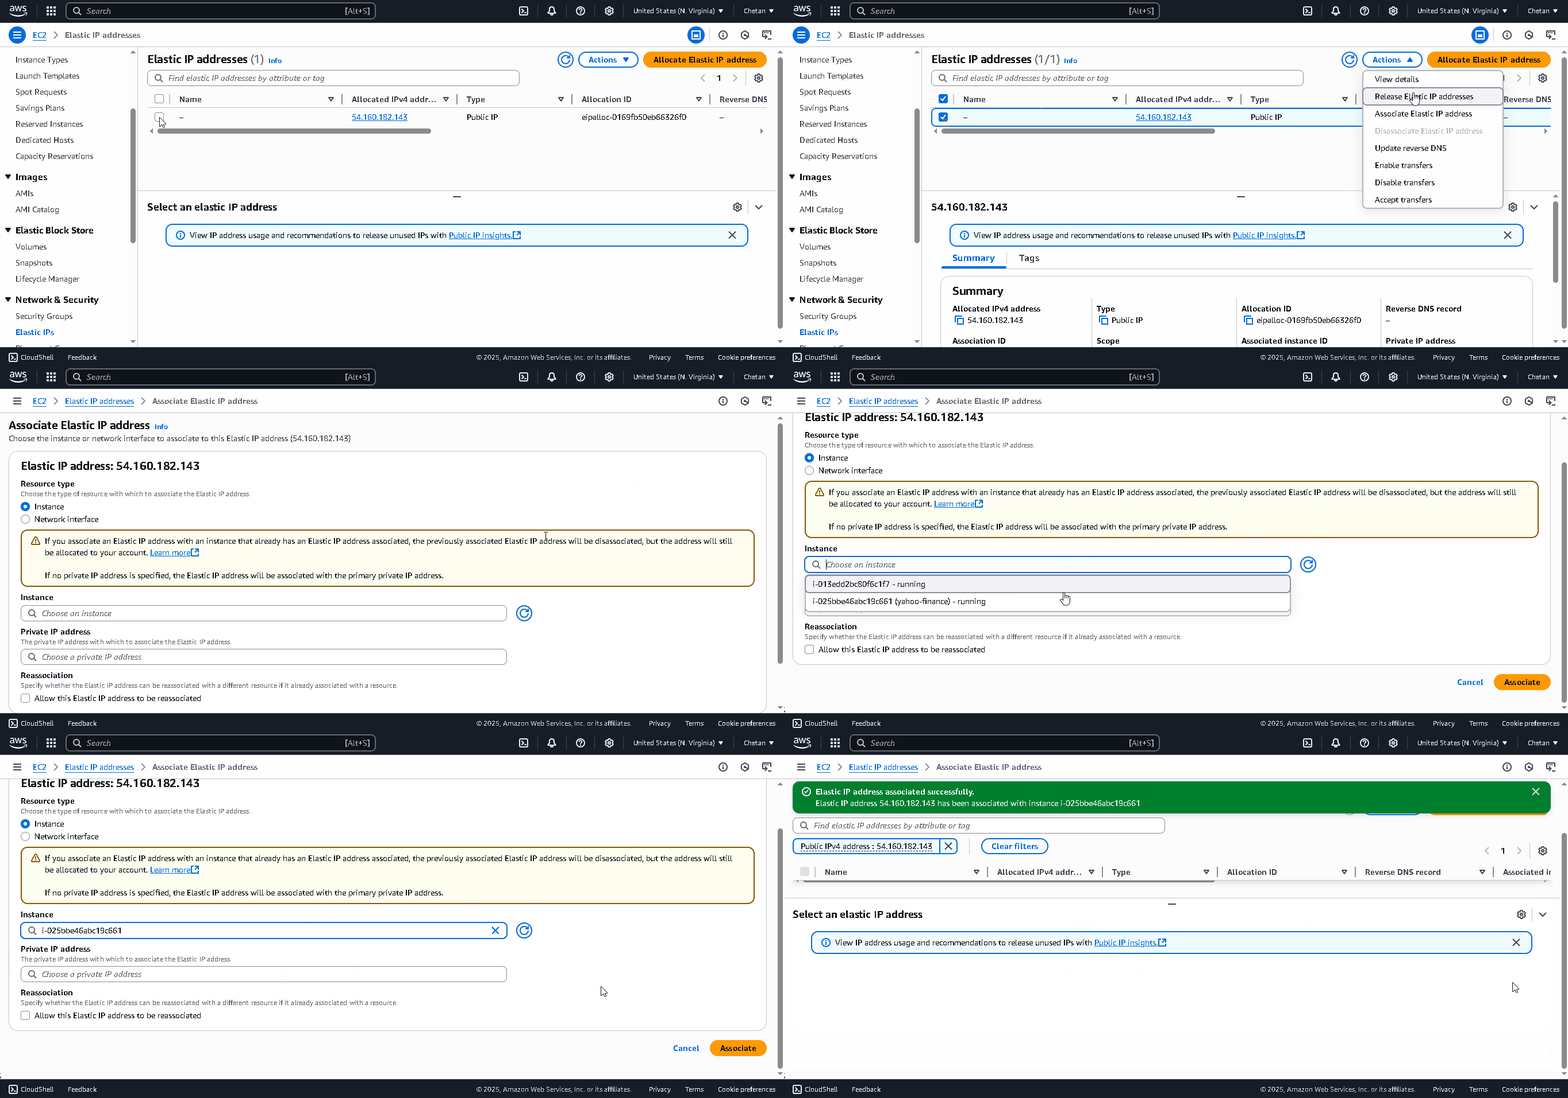
Now, associate the Elastic IP:
- Go to Elastic IPs
- Select your previously created Elastic IP
- Click Actions > Associate Elastic IP address
- Select your newly created instance and click Associate
-
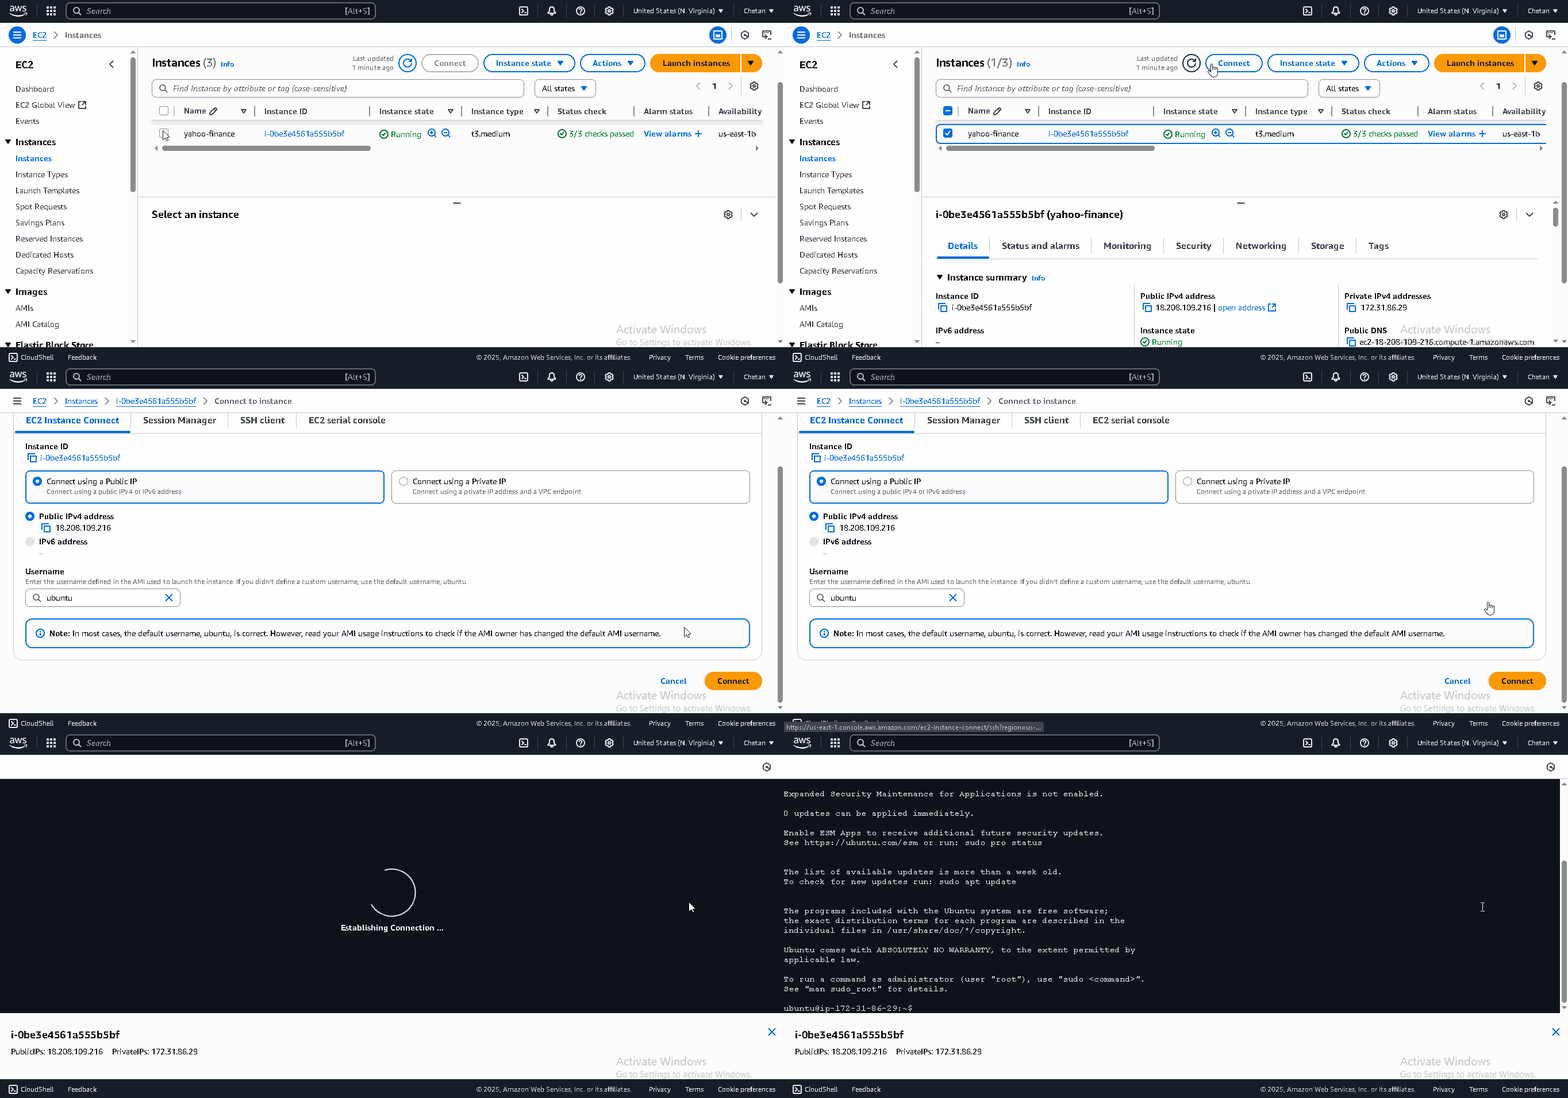
Connect to your instance via SSH:
- Go to EC2 Instances
- Select your instance
- Click Connect > EC2 Instance Connect
- Click the Connect button
Now that your EC2 instance is ready, let's install your Botasaurus Desktop API.
-
First, install the necessary packages on your instance by running the command below. This script installs Botasaurus CLI and the Apache web server to manage requests to your app.
curl -sL https://raw.githubusercontent.com/omkarcloud/botasaurus/master/vm-scripts/install-bota-desktop.sh | bash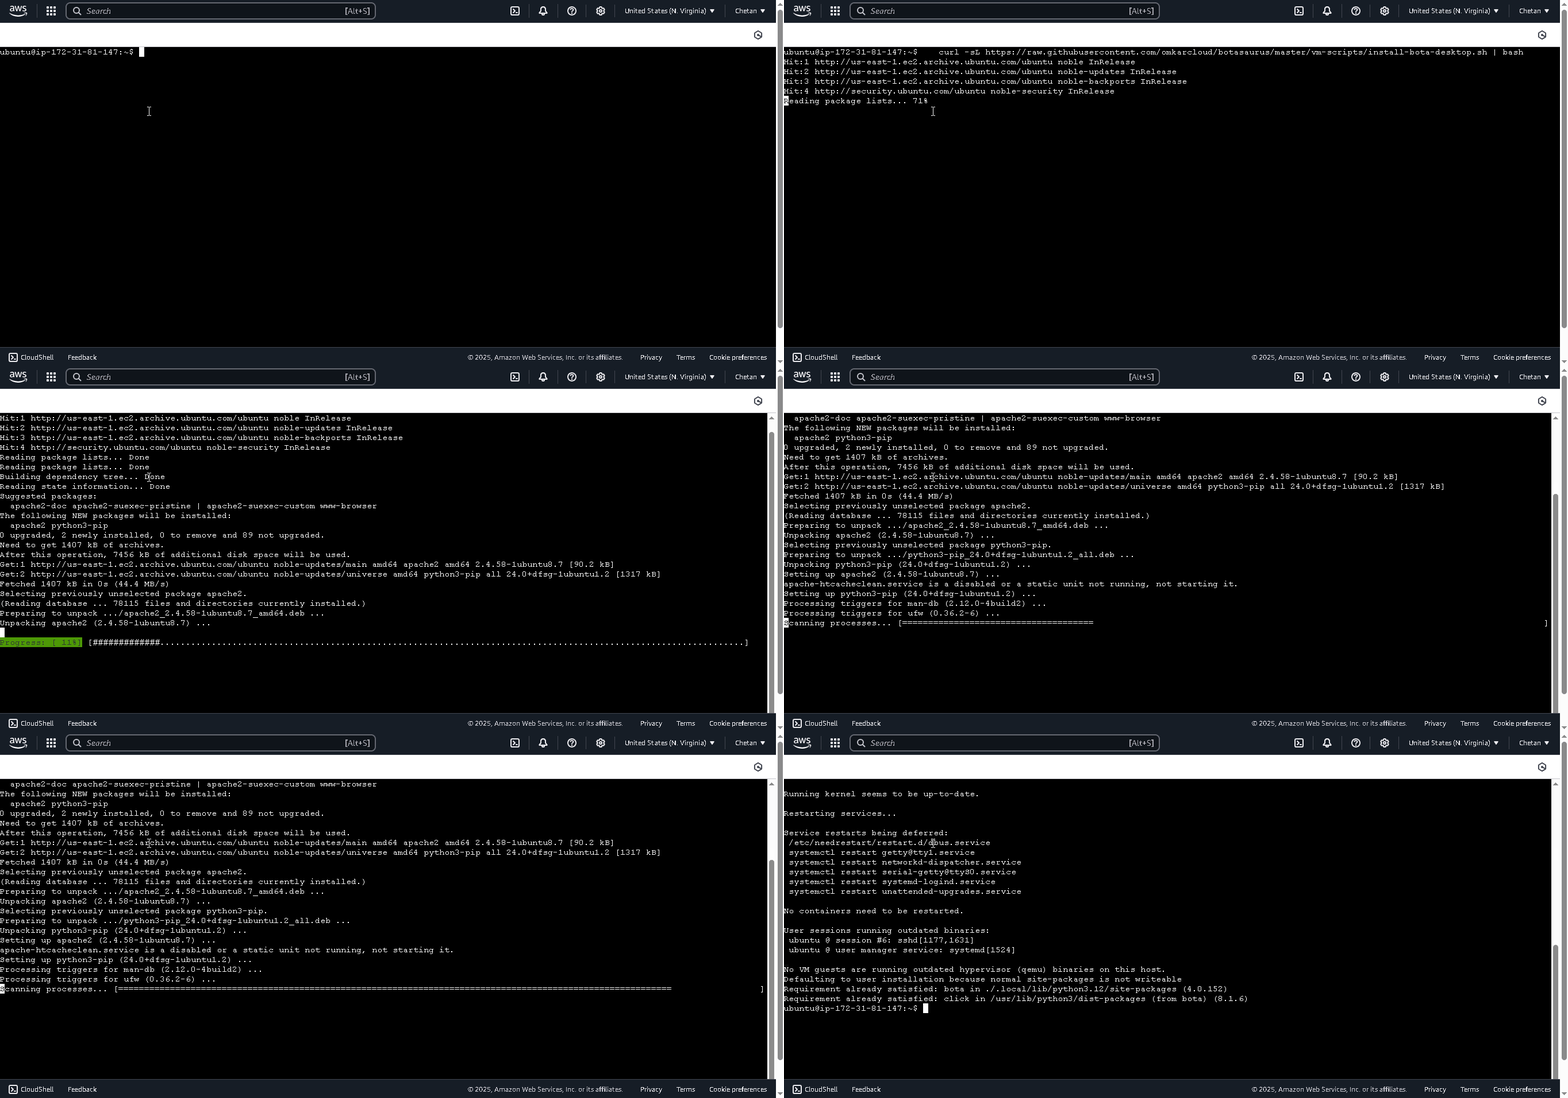
-
Next, install the desktop application on the EC2 instance.
To get your
AUTH_TOKEN, sign up for a free account at omkar.cloud and visit this page and see the "What is my auth token?" FAQ, which gives you your auth token. Once you have your auth token, replaceAUTH_TOKENwith your actual token in the command below.python3 -m bota install-desktop-app --debian-installer-url https://www.omkar.cloud/l/deb --custom-args "--auth-token AUTH_TOKEN"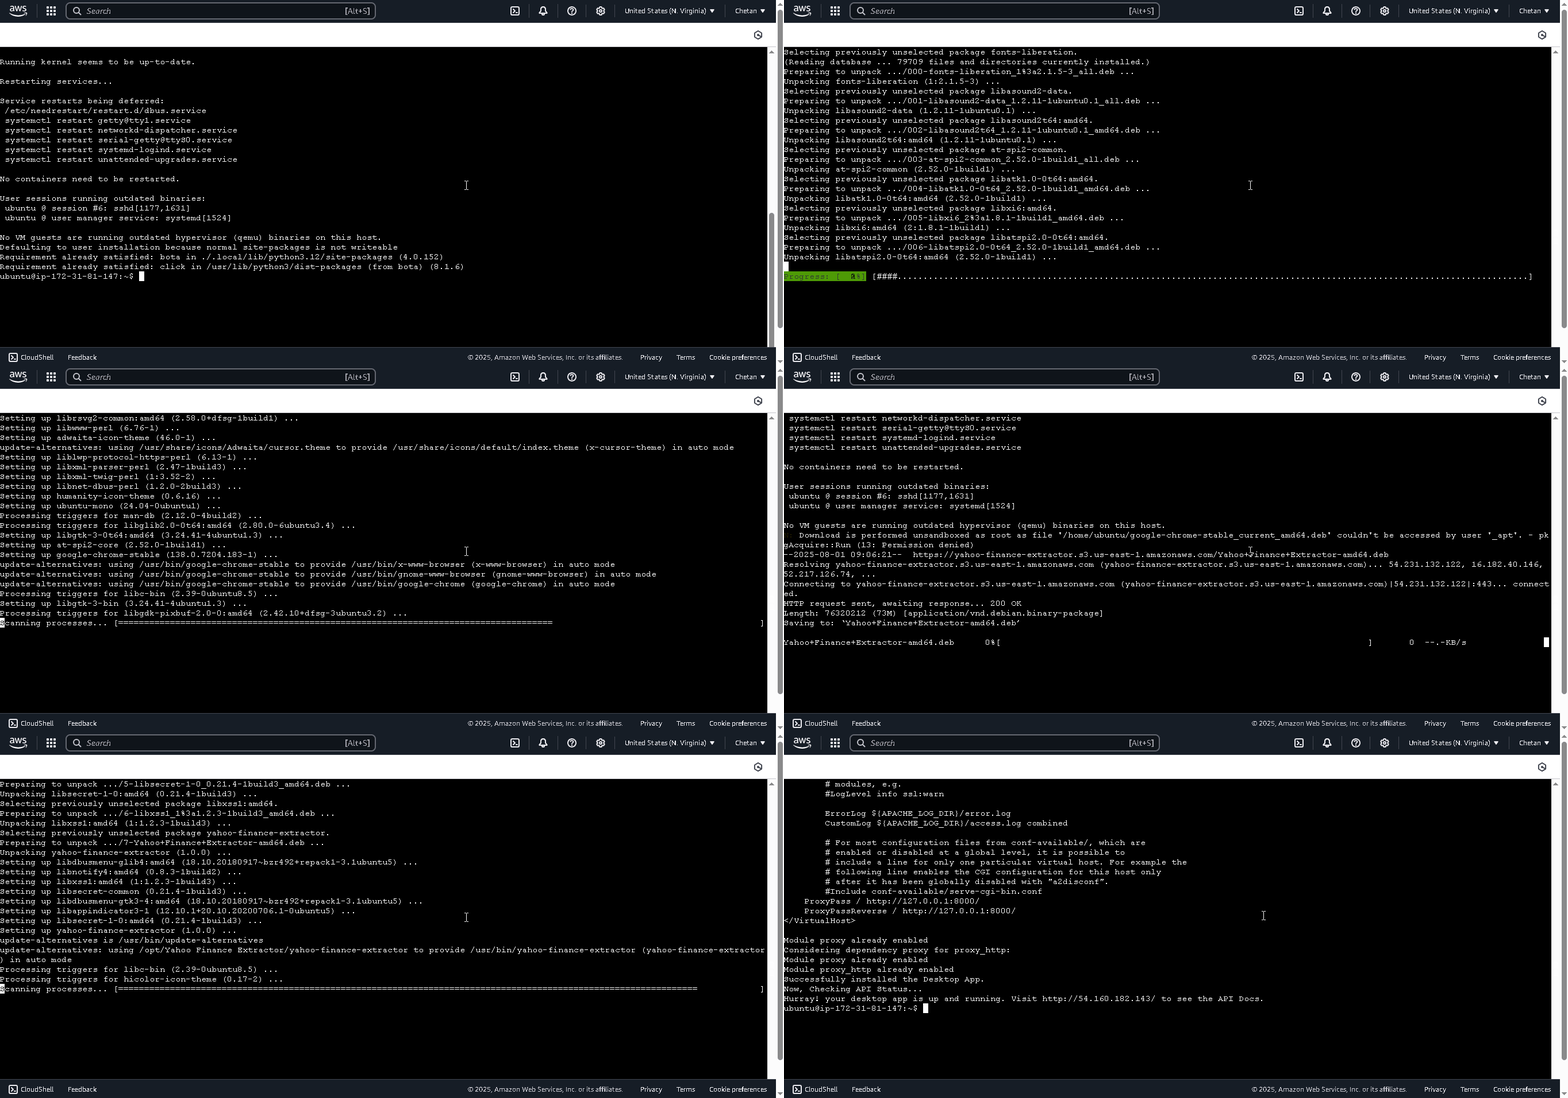
When the installation completes, you'll see a link to your API documentation. Visit it see the api.

:::warning[Backup Your Data] Before deleting the instance, download any important data to avoid permanent loss. :::
To prevent ongoing costs, you must delete both the EC2 instance and release the Elastic IP address as follows:
-
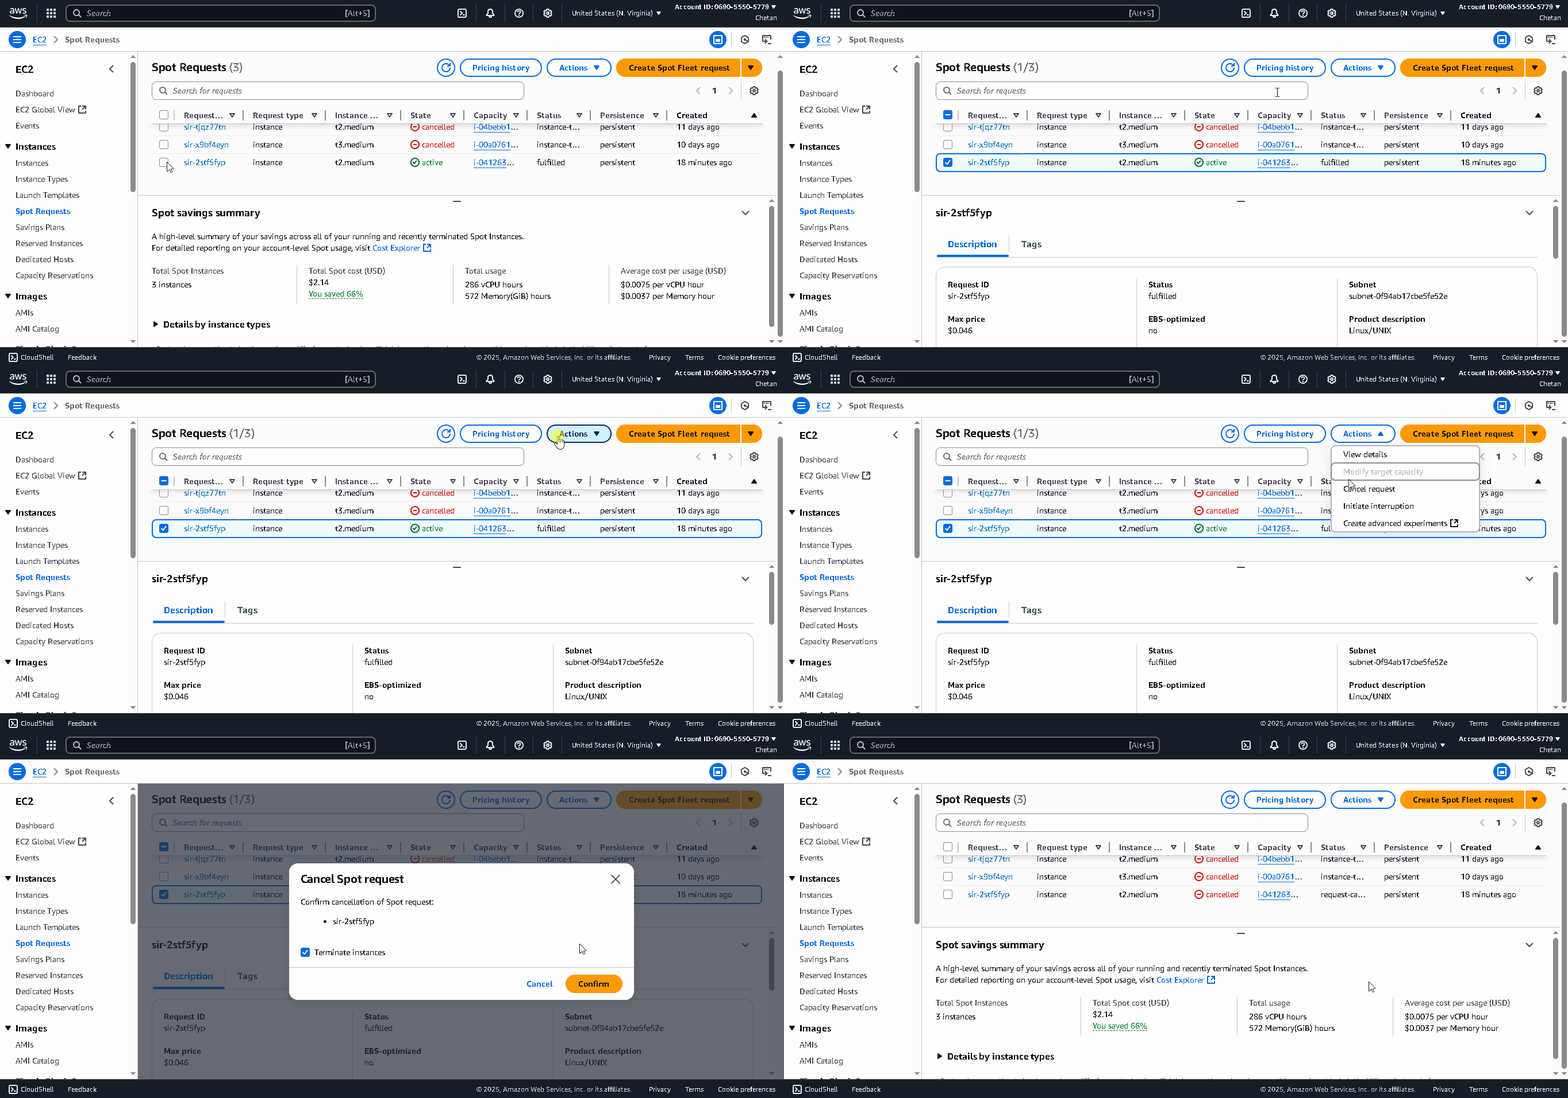
Cancel the Spot Request (Spot VMs only) If you have enabled Spot Instances, cancel the Spot request before deleting the instance. Otherwise, they will keep respawning, again and again. To cancel the Spot request:
- Go to Spot Requests
- Select your Spot request
- Click Actions > Cancel request
- Click Confirm to cancel
-
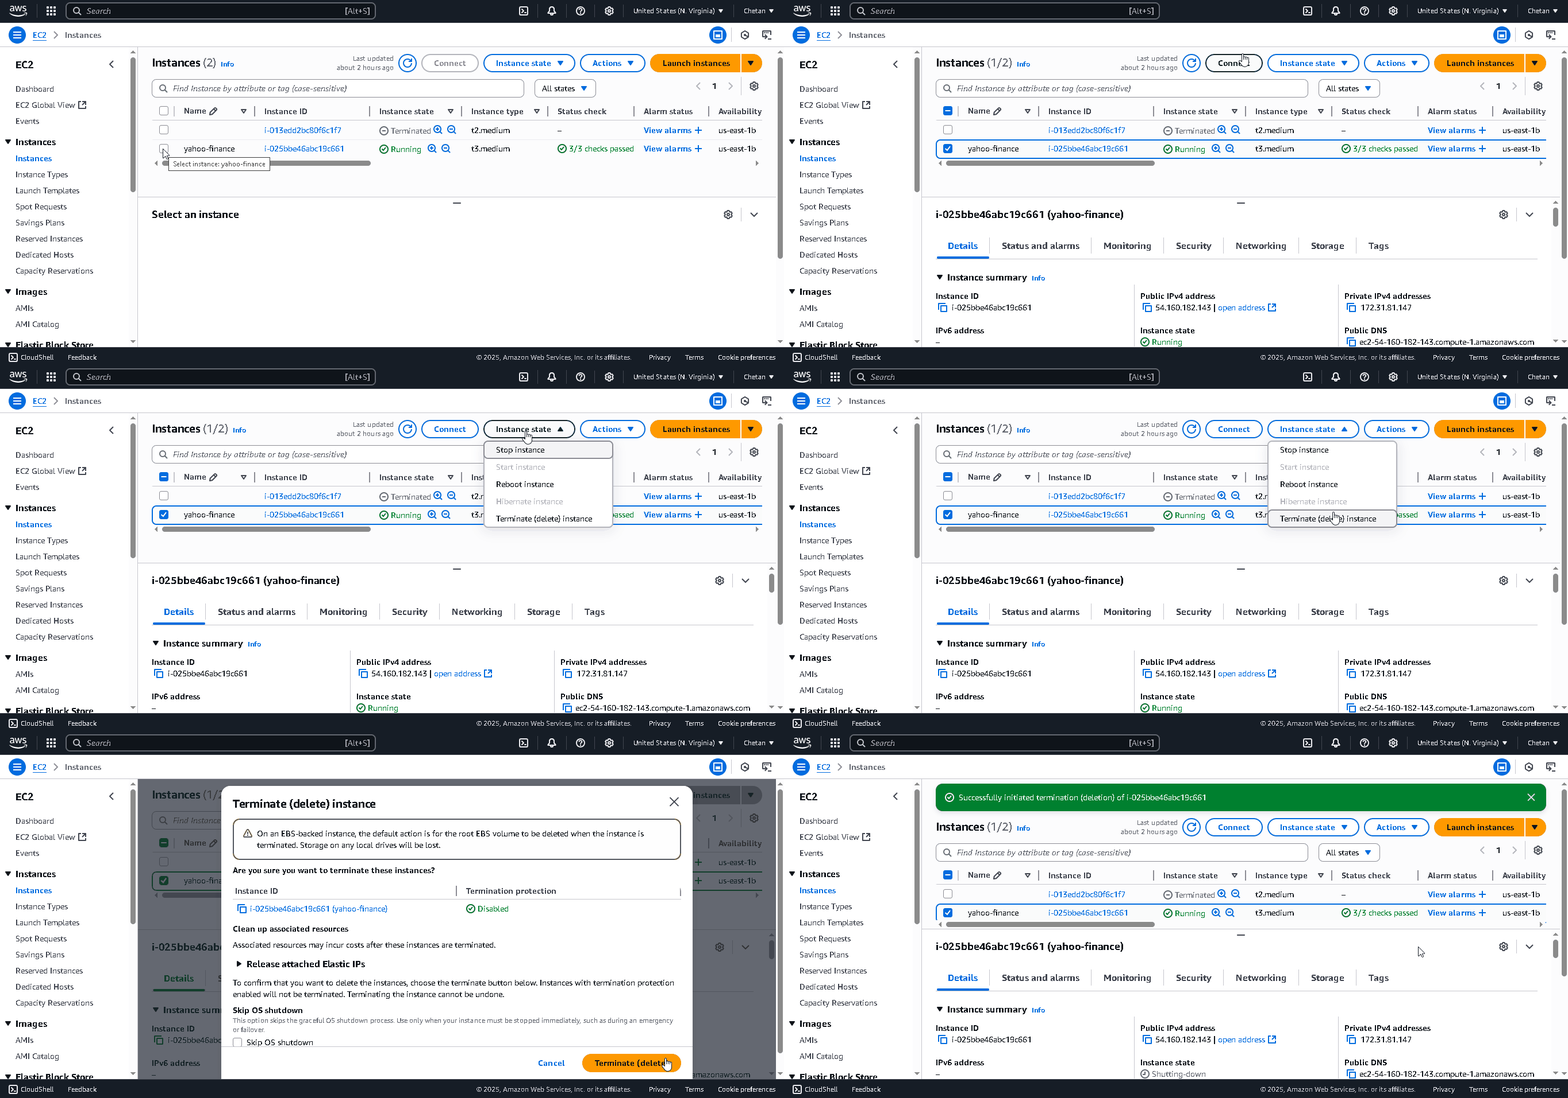
Terminate the EC2 Instance
- Go to EC2 Instances
- Select your instance
- Click Instance state > Terminate (delete) instance
- Click Terminate (delete) to confirm
-
Release the Elastic IP Address
- Go to Elastic IPs
- Select your Elastic IP
- Click Actions > Release Elastic IP address
- Click Release to confirm
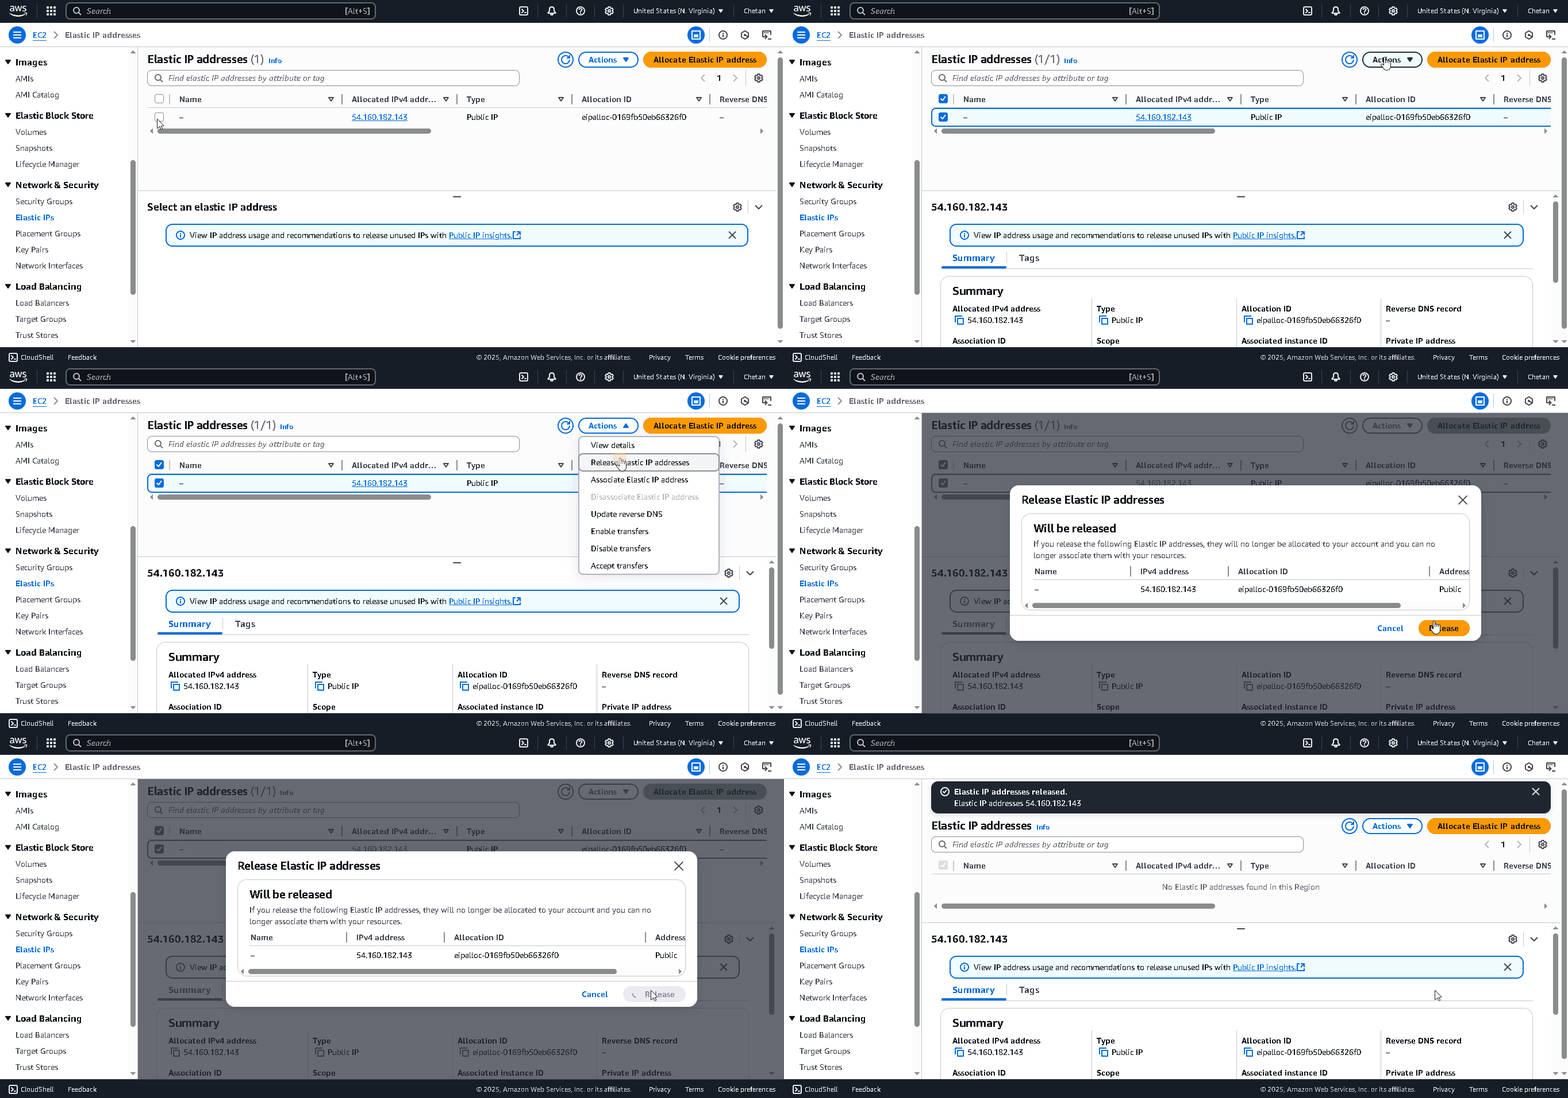
That's it! You have successfully deleted the EC2 instance and released the Elastic IP. You will not incur any further charges.
Please follow the steps mentioned in this guide.