This package will allow you and your administrators to login to the OPNsense dashboard with a OpenID Connect provider.
Download the package from releases and install on your opnsense via the console:
pkg add os-oidc-1.0.pkg
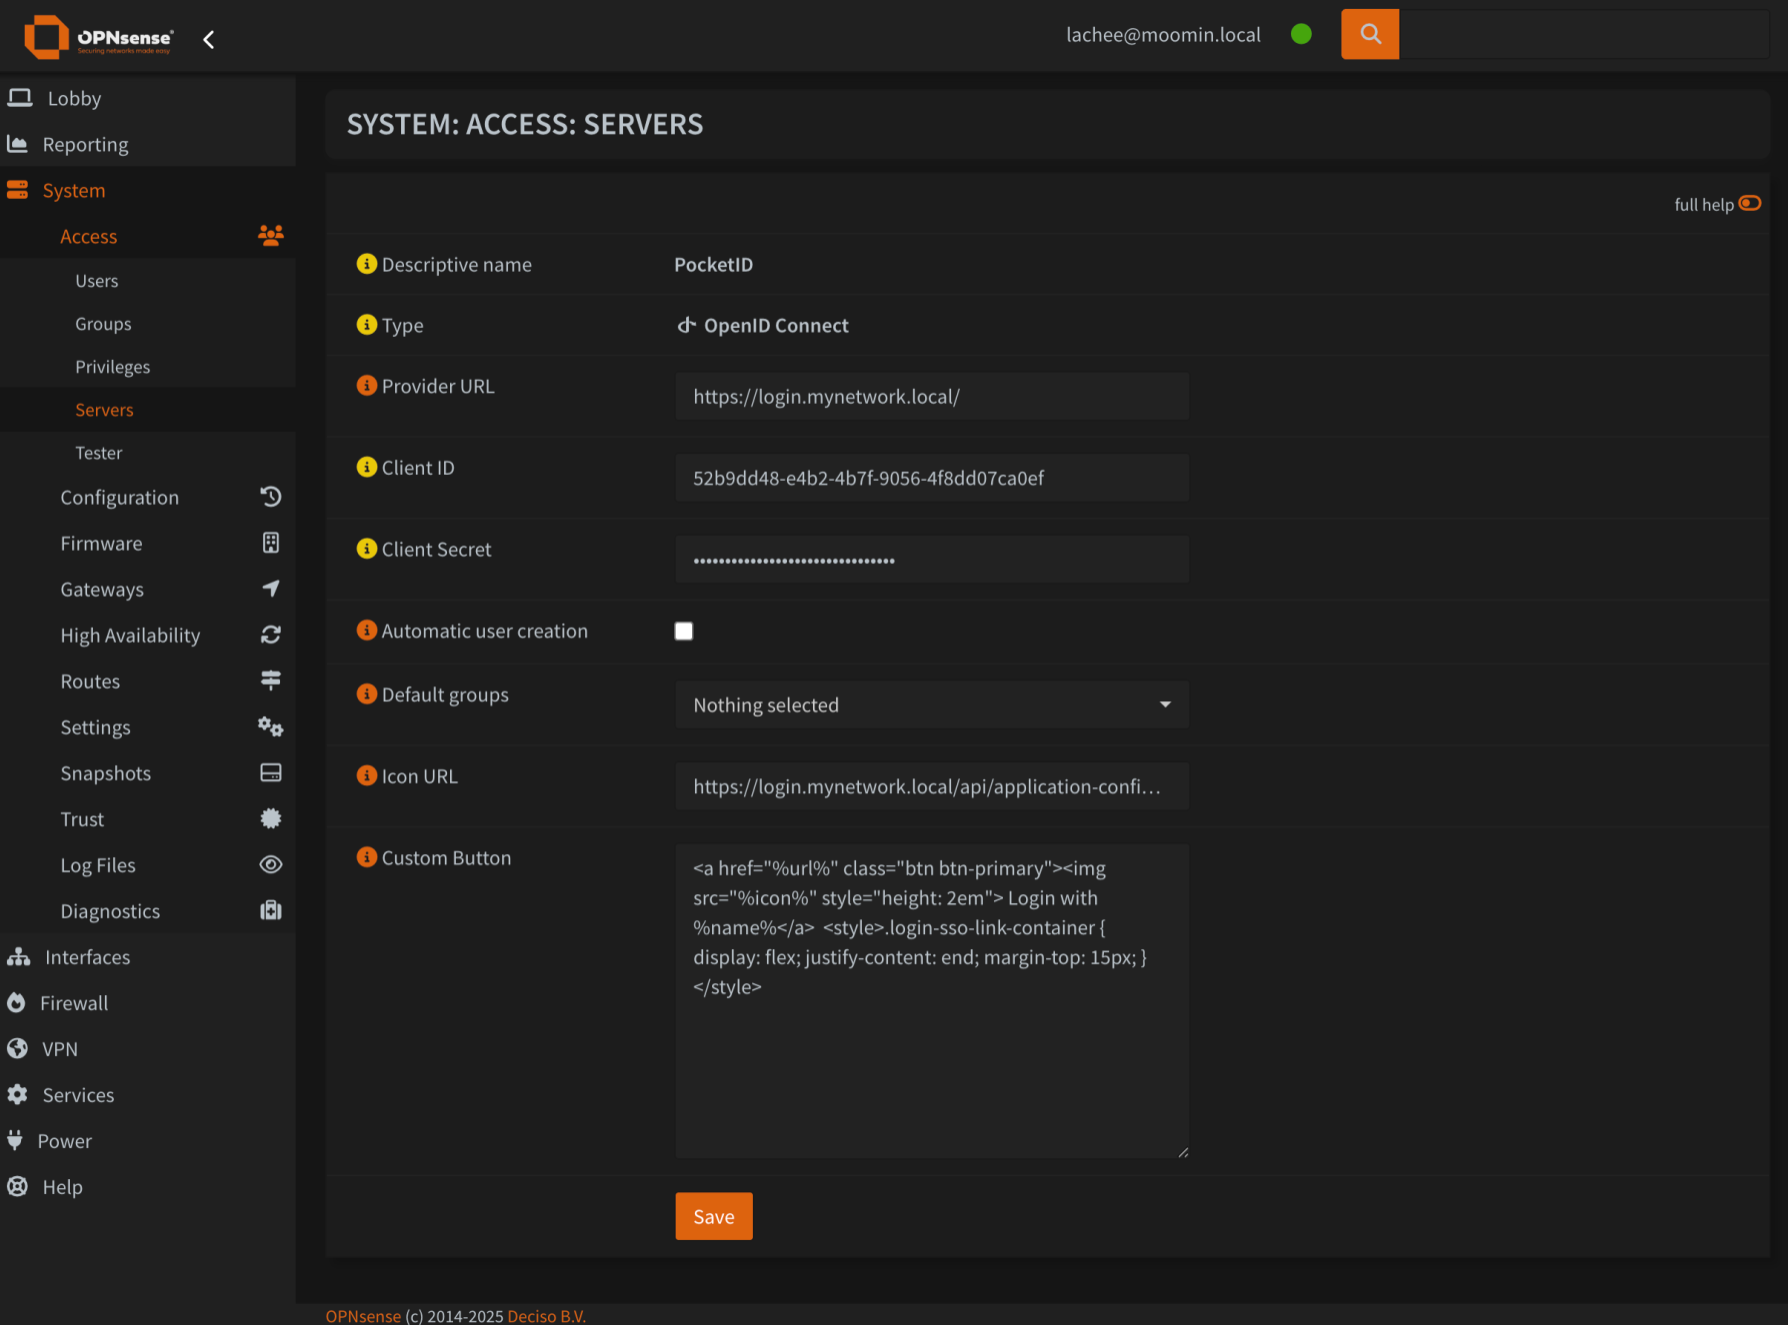
This is a link to the provider. The URL will need to have /.well-known/openid-configuration available for discovery.
The provided ID from your OIDC provider
The secret from your OIDC provider
The field from the user payload that contains the username.
Scopes to request form the OIDC Provider. For example, openid, email, profile.
When a user logins and does not have a matching user account in the local database, this will create a new user. This is to be used in conjunction with Default Groups
Warning
It is recommended to keep this disabled. Your firewall isn't a service that should readily accept new users.
When a new user is created, these groups will be assigned to them.
An optional URL that will be proxied for the login button. You can access it at /api/oidc/auth/icon?provider=<name>
When provided, the button will be replaced with the custom one. There are several templates available:
%name%Name of the provider%url%URL that will start the auth flow%icon%The proxied icon image (useful to avoid CORS).
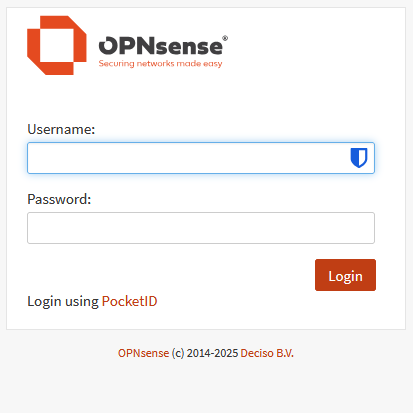
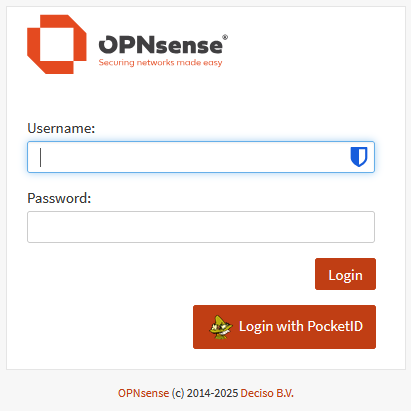
As an example, here is one that makes a nice big icon next to the login button
<a href="%url%" class="btn btn-primary"><img src="%icon%" style="height: 2em"> Login with %name%</a>
<style>.login-sso-link-container { display: flex; justify-content: end; margin-top: 15px; margin-right: 9px; }</style>| Before | After |
|---|---|
 |
 |
Users being logged in are mapped against the preferred_name claim and is checked against the local database's username and email fields.
There is no group maaping at this stage.
| Property | Value |
|---|---|
| Callback | https://<ip of opnsense>>/api/oidc/auth/callback |
provider:
| Property | Value |
|---|---|
| Public Client | false |
| PKCE | false |
| Requires Re-Authentication | false |
client (opnsense):
| Setting | Value |
|---|---|
| Username claim | preferred_username |
WIP
To get VSCode to behave correctly with the OPNSense PHP, we will need to tell the language server where to find the classes we use.
I use Intelephense for work, and this is easy to configure with the includePaths setting.
There are several parts we need:
- opnsense/core
- This handles all the core functionality with OPNSense
- phalcon/ide-stubs
- OPNSense uses the Phalcon framework, and this is a stubs library specifically for this use case.
Once these are cloned into a repository, you can configure Intelephense to use them:
{
    "intelephense.environment.includePaths": [
        "D:\\projects\\opnsense\\core\\src\\opnsense\\mvc",
        "D:\\projects\\opnsense\\core\\src\\etc\\inc",
        "D:\\projects\\opnsense\\core\\src\\www",
        "D:\\projects\\opnsense\\ide-stubs\\src"
    ],
    "explorer.compactFolders": false,
    "files.associations": {
        "*.inc": "php",
    }
}Here are the steps i have gotten to work with setup.
-
Clone opnsense/plugins to
/usr/plugins -
Clone opnsense/tools to
/usr/tools -
cd /usr/toolsandmake update -
make plugins(this might not be required. This will take a long time and tends to crash at libpam. I abort at this time ) -
Clone your project to
~/project-name -
Copy the project's content to
/usr/plugins/devel/project-name -
Build with
cd /usr/plugins/devel/project-name && make package -
Install
pkg add /usr/plugins/devel/project-name/work/pkg/*.pkg