Repository navigation
Build Guide
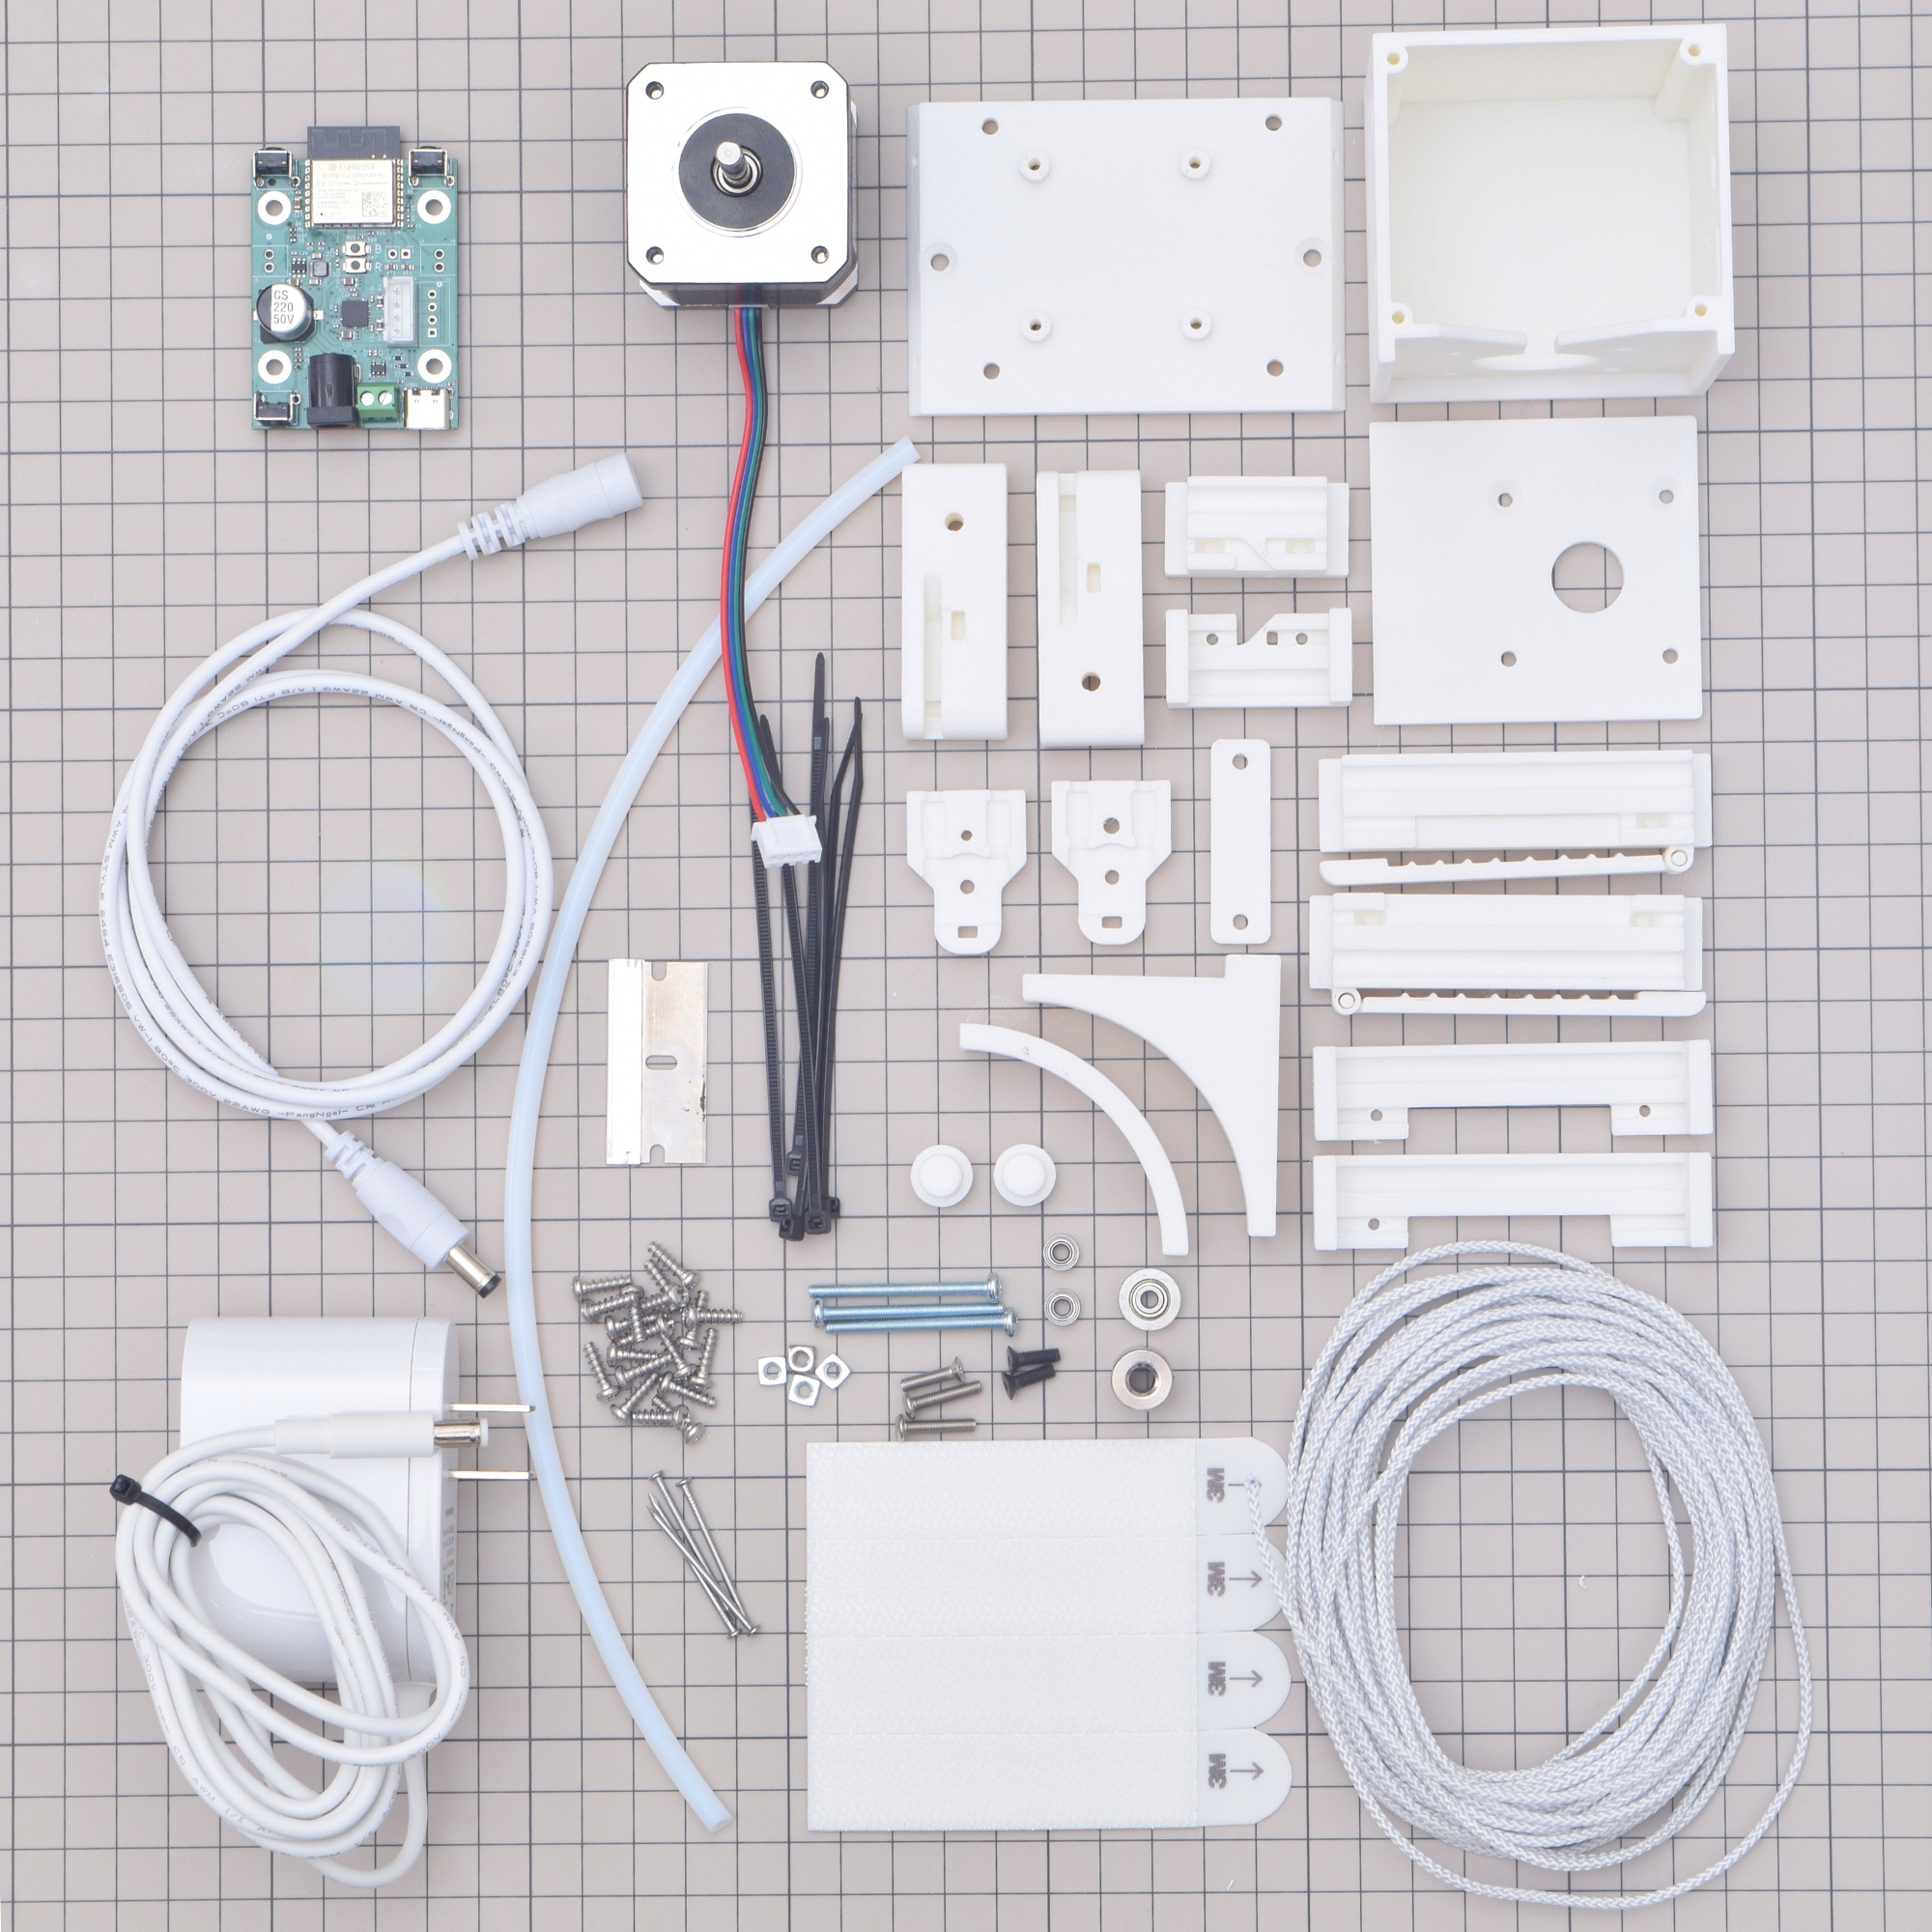
Assembling a Ropener takes about 20 minutes with three common hand tools — no soldering. It comes together in three stages: the motor body, the curtain-rail carriages, and attaching it to your curtains. Follow whichever guide below suits you — they all cover the same build.
🆕 New in v1.1 — This guide covers the current v1.1 hardware:
- Stronger pull (11 lb → 15 lb) from a smaller-diameter MK8 drive gear (replaces the MK7).
- One larger 633ZZ bearing (3 × 13 × 5 mm) per arm instead of two small bearings.
- Pre-cut PTFE tubes (10 / 40 / 70 mm) — no measuring or razor-cutting.
Print from
hardware/plastics/v1.1. The v1.0 files remain in the repo for anyone who already built one.
| Guide | Best for |
|---|---|
| 🖼️ Illustrated print guide | A diagram for every screw — follow along step by step |
| 🎬 Video walkthrough | The big picture and the fiddly parts in motion |
| 📝 Written steps (on this page) | Quick reference and searching |
comments below mark them.💬 Trouble with anything? Email Daniel at daniel@valarsystems.com, or open an issue.
Suggested filenames are given in each comment. -->
- Before you start
- Bill of materials
- Curtain compatibility
- Motor body assembly
- Curtain rail assembly
- Attaching to your curtains
- Rope routing and tensioning
- Next steps
Your kit may or may not include these — the goal is to provide them, but that may not be implemented yet.
| Tool | Size |
|---|---|
| Phillips screwdriver | #1 |
| Hex driver (Allen wrench) | 2 mm |
| Hex driver (Allen wrench) | 1.5 mm |
If you have grommet curtains, we strongly recommend curtain glide tape (available on Amazon). Without it the Ropener usually will not work. If your curtains don't slide smoothly, glide tape almost always fixes it.
All plastics are printed on an FDM printer. A few parts use supports that must be removed by hand. Everything fits a 220 × 220 mm bed, and PLA is fine for indoor use.
| Setting | Value |
|---|---|
| Layer height | 0.3 mm |
| Infill | 20%, grid |
| Supports | Yes (on some parts) |
| Total print time | ~9 hours |
Ropener runs ESPHome — the supported, actively maintained firmware. See the Firmware Guide for flashing and updates. (Alternative builds have existed but are unsupported; firmware contributions via pull request are welcome.)
Everything the build needs is below. For the full, maintained list see the Bill of Materials.
| Item | Quantity |
|---|---|
| VAL3000 / VAL3100 PCB | 1 |
| NEMA 17 stepper motor | 1 |
| 24 V 1.5 A power adapter | 1 |
| Cable extension | as needed |
| Foam mounting squares (set of 5) | 5 |
| 1.6 mm rope | 30 ft |
| PTFE tubing (pre-cut: 2 × 10 mm, 2 × 40 mm, 2 × 70 mm) | 6 |
| M3 square nut | 4 |
| M3 × 35 mm button-head screw | 3 |
| V-groove pulley | 1 |
| M3 × 10 mm flat-head screw | 2 |
| M3 × 15 mm button-head screw | 3 |
| Bearing (633ZZ, 3 × 13 × 5 mm) | 2 |
| MK8 drive gear | 1 |
| Zip tie | 4 |
| M3 × 10 mm thread-forming screw | 22 |
This device works on the following curtain types.
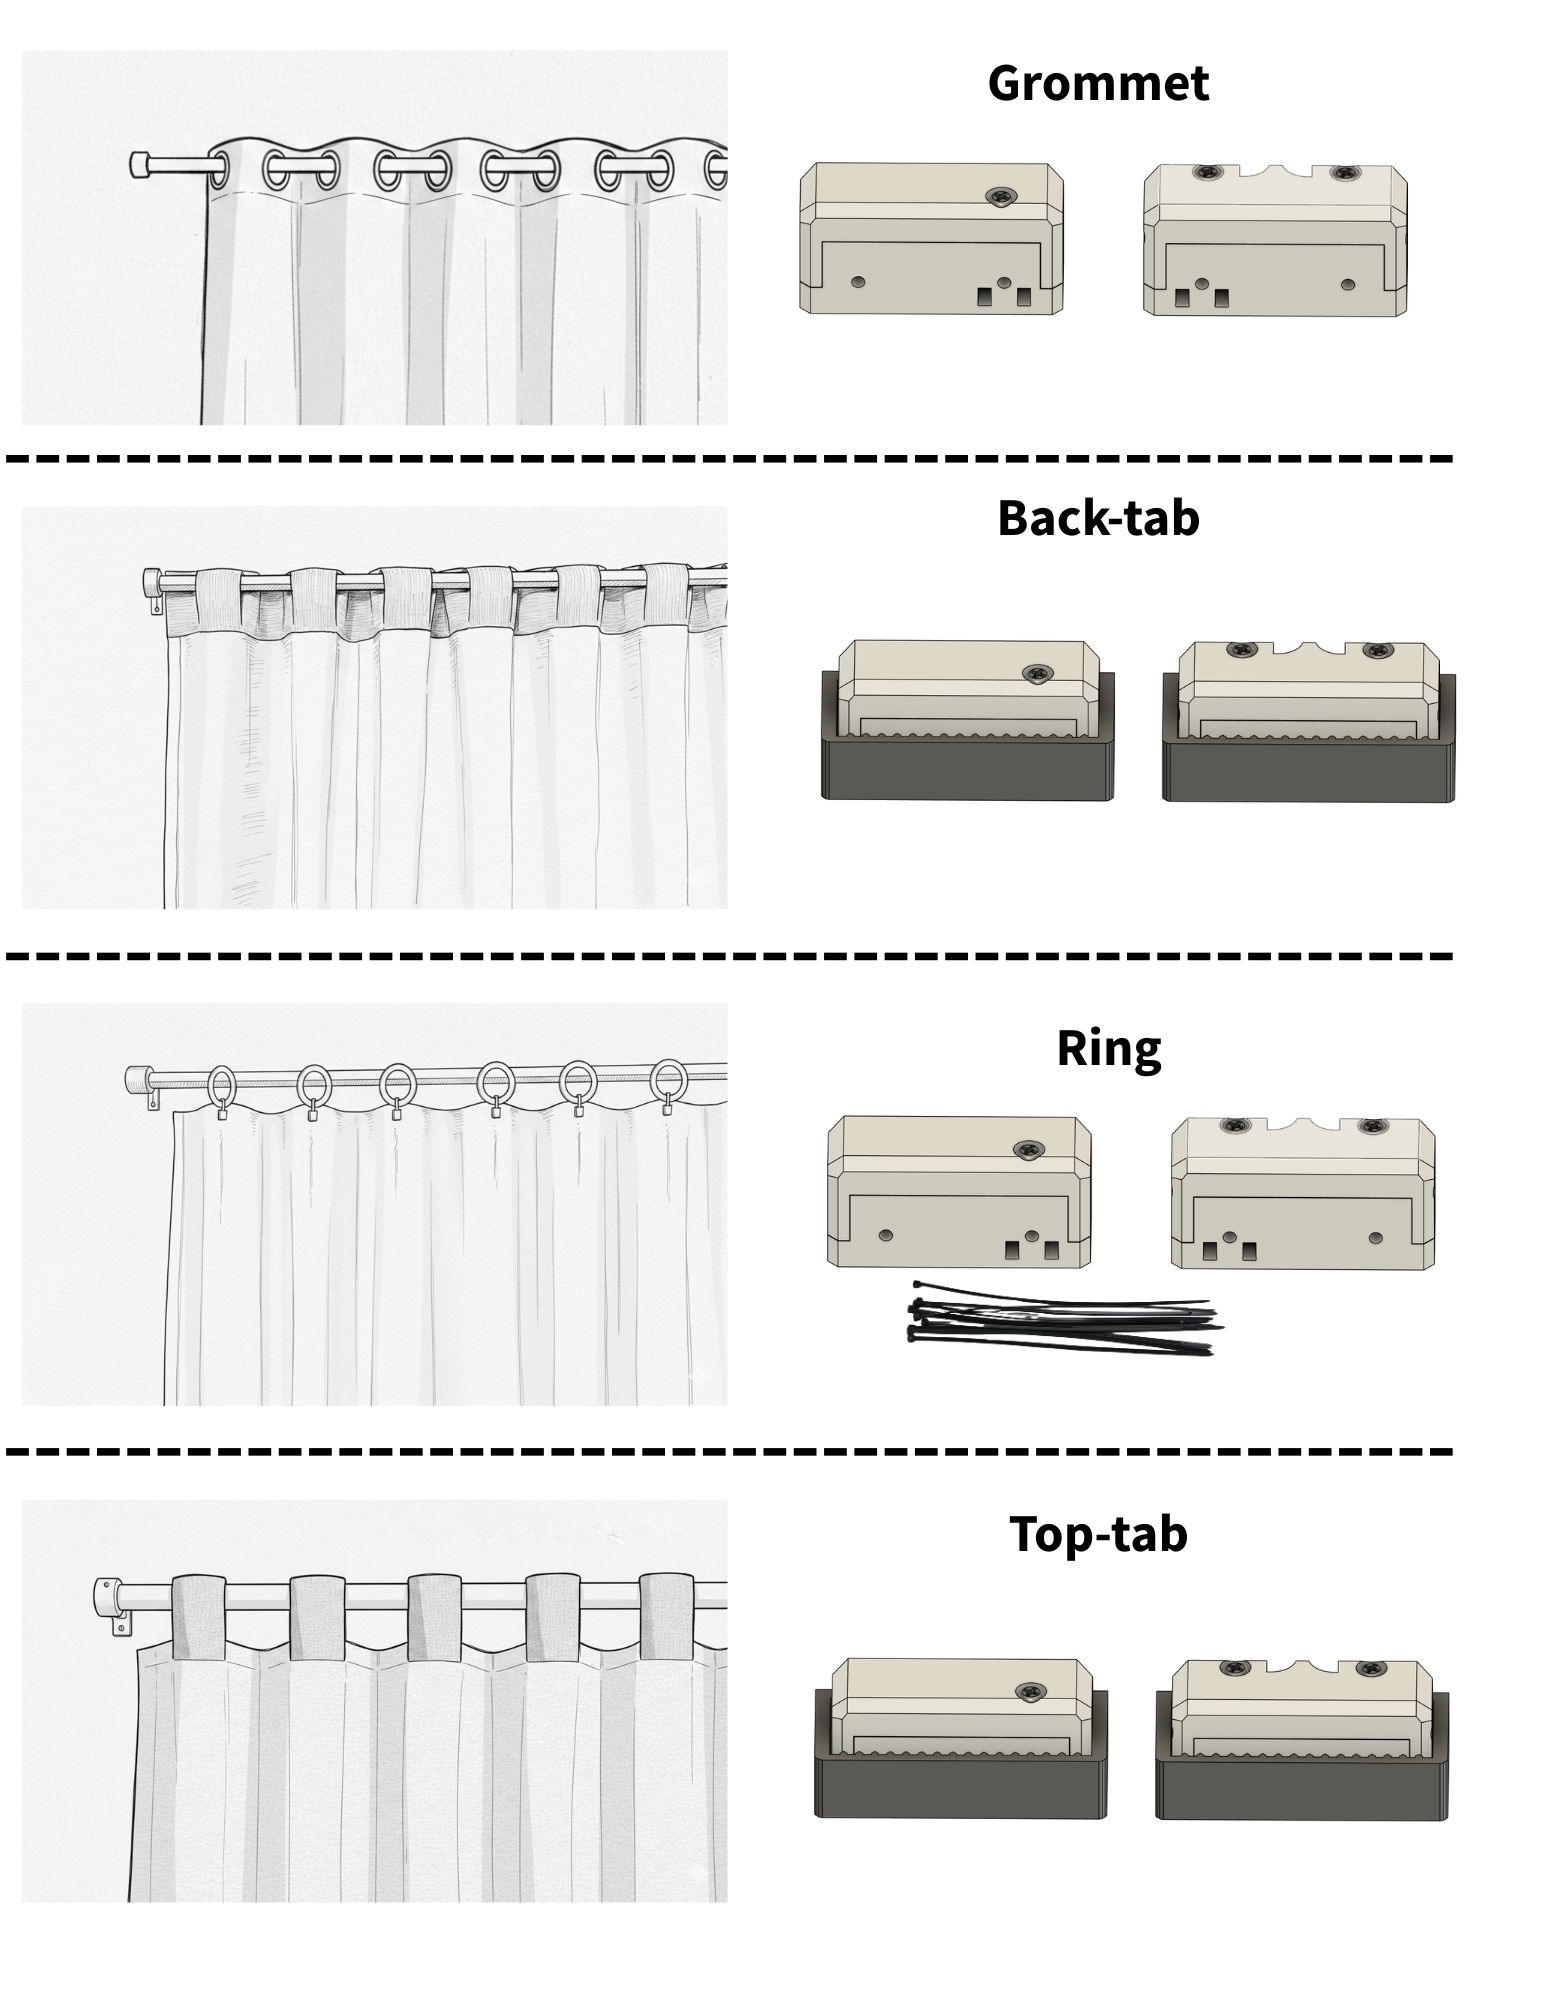
| Type | Performance | Notes |
|---|---|---|
| Back-tab | ⭐ Excellent | Best results. |
| Ring | Good | May require glide tape. |
| Grommet | OK | Requires glide tape. |
| Top-tab | Likely great (untested) | Should behave like back-tab if similar. |
- Mount the motor. Place the motor into the housing with the wires pointing down, and secure it with two black M3 × 10 mm screws.
- Mount the PCB and wire the motor. With the plastic facing up, attach the PCB to the wall plate using the four M3 × 10 mm plastic thread-forming screws. Then connect the four motor wires to the screw terminals — you may need to cut and strip the wire ends.
- Fit the buttons and close the body. Place the buttons into their holes, then attach the wall plate to the housing using four M3 thread-forming screws.
- Attach the drive pulley. Fit it onto the motor shaft. You'll fine-tune its position later.
- Assemble the two arms. Each arm uses an M3 × 15 mm button-head screw, one 633ZZ bearing (3 × 13 × 5 mm), and an M3 square nut. On one of the two arms, also seat a third M3 square nut into its pocket now — that pocket is inaccessible once the arms are mated, and the M3 × 35 mm clamp screw in Step 8 threads into this nut to pull the arm pair against the drive pulley. Build both arms the same way.
- Attach the arms to the motor. Fasten the plastic connector and both arms to the motor using two M3 × 35 mm button-head screws (two of the three arm assembly screws).
- Check alignment. Make sure the drive pulley is perfectly aligned with the two idler pulleys.
- Join the bottom of the arms. Use the third M3 × 35 mm screw to connect the bottom of both arms — it threads into the square nut you seated in Step 5 and clamps the arm pair against the drive pulley. Do not tighten yet — you'll do this after the rope is connected to the pulley.
- Apply the mounting squares. Wipe the marked area on the back of the body clean and dry, then press the five 1" foam mounting squares firmly into place.
Overview. Along the rod, from one end to the other, you'll have: the pulley, a carriage with one screw on top, a carriage with two screws on top, and the motor-side anchor.
The PTFE tubes come pre-cut — no cutting needed. You'll have two of each length:
| Length | Size | Quantity |
|---|---|---|
| Short | 10 mm | 2 |
| Medium | 40 mm | 2 |
| Long | 70 mm | 2 |
- Long tubes. Place the two long tubes, then attach the top plastic using two M3 thread-forming screws.
- Pulley end. Fit the short tubes, then the V-groove pulley held by an M3 × 15 mm button-head screw, secured with an M3 square nut and an M3 thread-forming screw.
- Carriages. Place one medium tube into each carriage, set the top plastic over the tubes, and drive four M3 thread-forming screws into the sides.
- Mount the rope elbow (motor side). Zip-tie the hole of the elbow to your curtain-rod wall mount.
- Mount the pulley (far side). Zip-tie the pulley to the wall mount at the opposite end.
- Pick your curtain type below and follow the matching steps.
- No extra parts — the whole carriage simply pushes against the grommets.
- Glide tape is usually required, because grommets create too much friction. Glide tape is a thick plastic tape applied to the top of the rod that reduces friction.
- The carriage hangs freely behind the first loop of the curtain panel.
- Use the toothed clamps: clamp the back tab between the clamp and the carriage, then secure with M3 thread-forming screws on the back.
- Use zip ties through the two slots in the carriage.
- Keep the excess tail and the zip-tie head on the back side of the carriage so they don't interfere with the rings.
- Not formally tested, but it's expected to work well using the same approach as back-tab.
If you have back-tab or ring curtains, attach the carriages to the curtains first.
- Route the rope through the motor-side elbow first.
- Route both rope ends so they exit from the carriage that has two screws on top (Exit 1 and Exit 2).
- Leave the carriage clamp screw loose for now — only screw it down at the very end, once you've found the correct rope position.
- Mount the motor directly below the elbow so the rope runs straight down.
-
Attach the rope to the motor pulley. Loosen the clamp screw, push the rope over the pulley, then re-secure the clamp screw.
⚠️ Don't overtighten the clamp screw — the motor won't be able to turn it. But if it's too loose, the pulley won't grip the rope.
- Tension the rope. Loosen the screw on the carriage, pull the excess rope out until the rope is taut, then tighten it down.
🔧 Moving it by hand: to turn the rope manually, only PULL UP from the motor pulley — never pull down on the rope.
- Install it on your curtains — 🪟 Installation Guide.
- Flash & configure the firmware — ⚙️ Firmware Guide · ESPHome Guide.
- Start using it — 📖 User Guide.
💬 Stuck on a step? Email daniel@valarsystems.com or open an issue with a photo and we'll help.