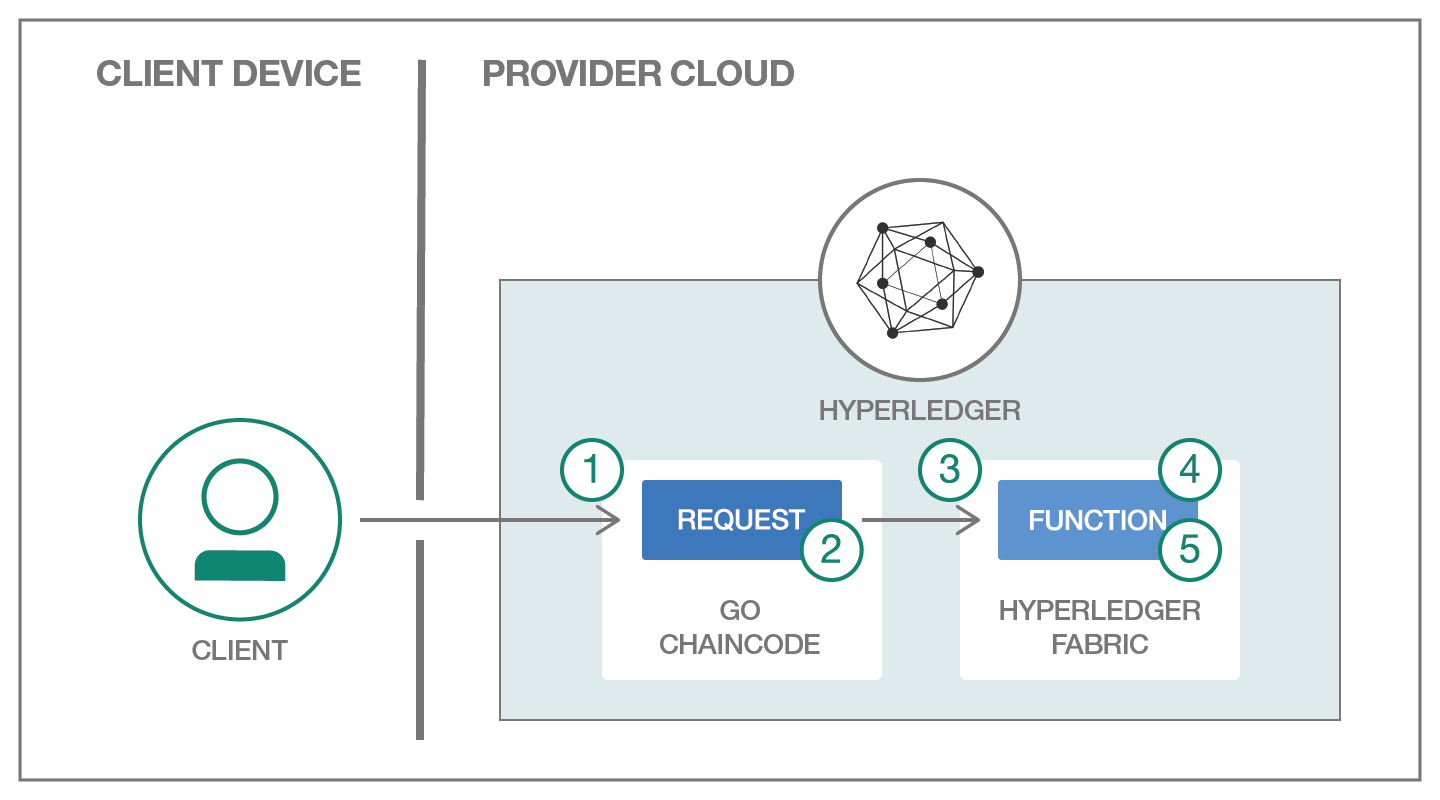
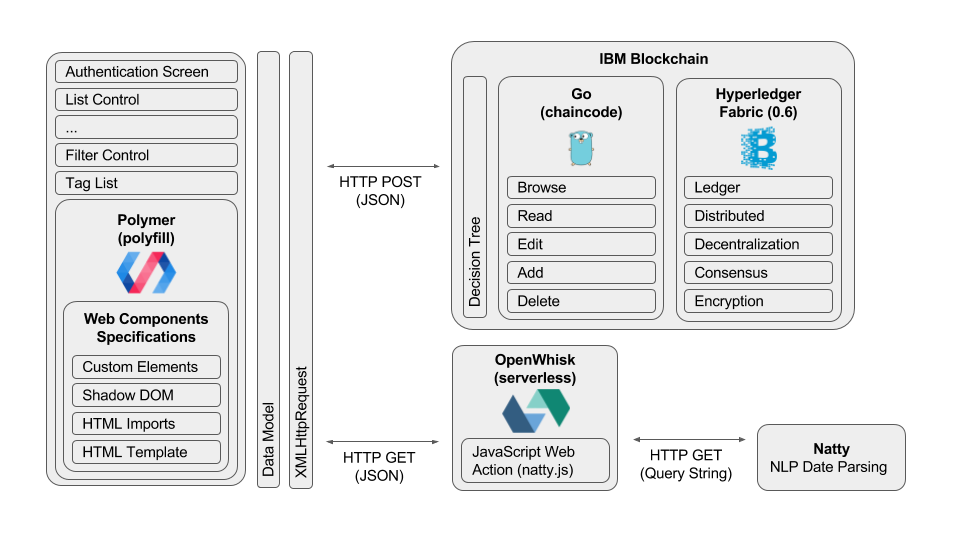
This project shows how to perform traditional data store transactions on IBM Blockchain. This surfaces as a web-based, to-do list application, allowing browse, read, edit, add, and delete (BREAD) operations.
IBM Blockchain is powered by the Linux Foundation Hyperledger Fabric 0.6 currently. That service is being deprecated, and will be replaced by the Hyperledger Fabric 1.0 architecture in the near future. At that point, this example will be updated to reflect migration patterns for businesses currently using the 0.6 architecture (privately or hosted on IBM Bluemix).
The to-do list application presented here is designed to help developers understand how common transactions needed by business processes can be adapted to use Blockchain. Blockchain != Bitcoin. It might be said that Bitcoin is the first Blockchain application. As a distributed ledger, the distinct characteristics such as decentralization, consensus, and encryption have broad-reaching implications to many business verticals including finance, transportation, health care, and others.
- IBM Blockchain
- OpenWhisk
Create an instance of IBM Blockchain on IBM Bluemix.
If you have not provisioned services on IBM Bluemix before, please follow the Setting Up IBM Blockchain tutorial.
You will also need a public GitHub repository.
- Deploy the compiled chaincode to a public GitHub repository
- Update the web application to map to your IBM Blockchain
- Run the web application on a local web server
- Using the to-do list application
A compiled chaincode application is included. By placing this file in a public GitHub repository, you make it available for IBM Blockchain consumption. Once the chaincode is deployed in a public GitHub repository, log into IBM Blockchain, and navigate to the deployment screen.
Chaincode is also commonly referred to as a "smart contract" in Blockchain terminology. Chaincode is authored using the Go language. This represents the business logic of what transactions can take place on the Blockchain.
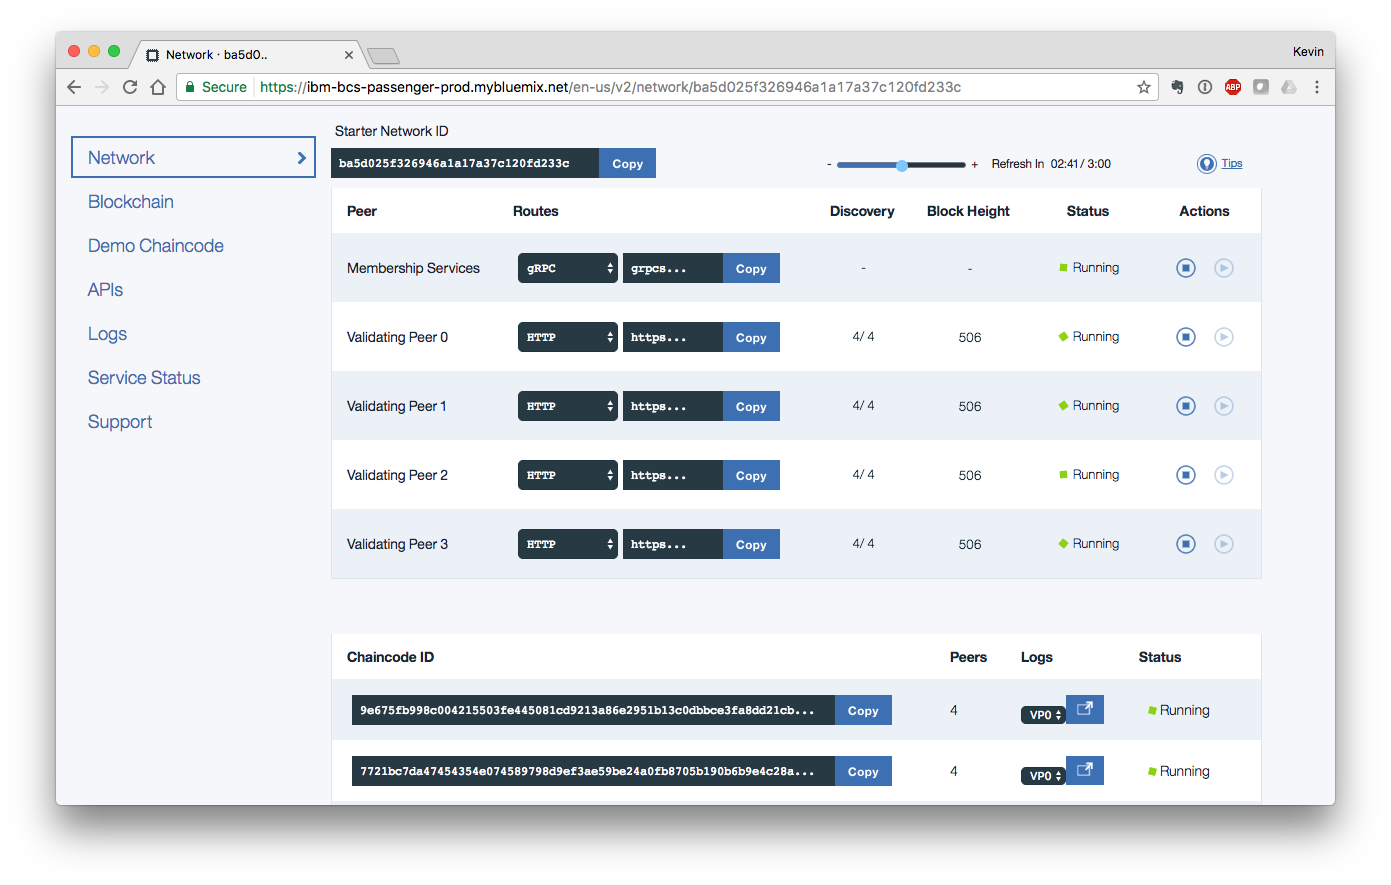
When you login to the IBM Blockchain console, you will be presented with a series of menu options down the left side of the screen. To deploy chaincode from your GitHub repository to Hyperledger Fabric, select the "APIs" menu option. A selection of "Validating Peer 0" is already made for you. To the right of that selection is a URL. Place this URL where you can refer to it later.
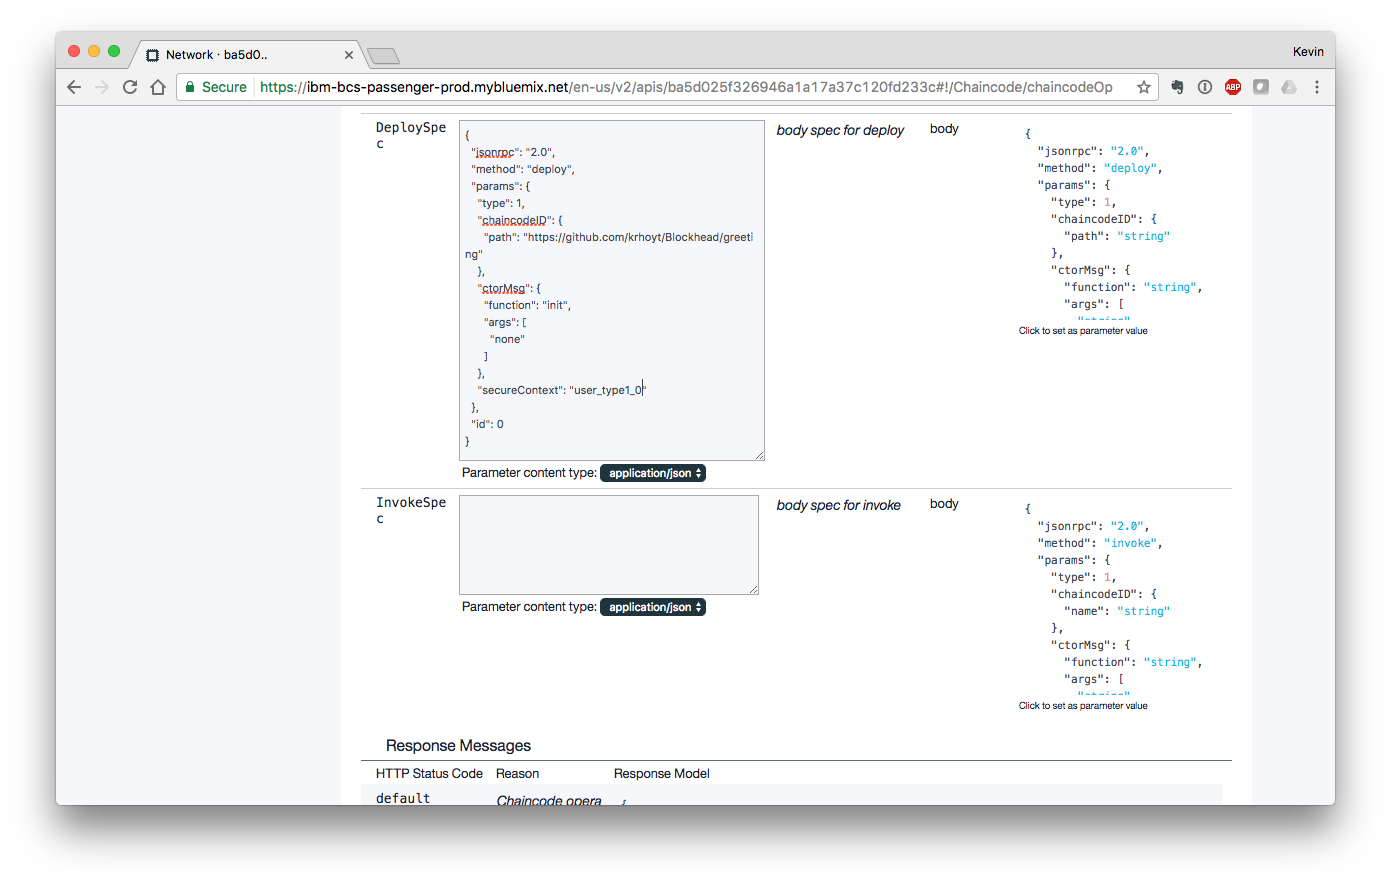
A heading on this screen is labeled "IBM Blockchain HTTP APIs" and includes a list of sections that can be clicked on and expanded. Click on the "Chaincode" section to open it.
Click on the "POST /chaincode" section to present the options for working directly with chaincode. In the "DeploySpec" section, click on the JSON block on the right side of the screen to populate the text area. Change the "chaincodeID" to point to the chain code in your public GitHub repository. Change the "secureContext" values to read "user_type1_0". Scroll down and click the button labeled "Try it out!" to deploy your chaincode.
Once the operation has completed, click on the "Network" section in the menu on the left of the screen. Place the value from the first row in the "Chaincode ID" section where you can refer to it later.
As this operation is an HTTP operation that sends a POST with a small JSON value, you may chose to use other tooling, such as Paw, for managing, testing, and interacting with your chaincode.
You have now deployed your first chaincode application onto IBM Blockchain. The next step is to place the values pertinent to your blockchain instance into the web application. This will enable the web application to communicate directly with your specific blockchain instance.
The web application places a data model abstraction over the service layer. The result is that there is only one place where the web application source code needs to be updated. In "/web/script/blockchain.js" change the "Blockchain.CHAINCODE" value to the chaincode ID value from the previous step, and the "Blockchain.URL" value to the validating peer value from the previous step. No further changes are required to use the web application.
There is a "test.html" page which is provided for those looking for more raw access to the underlying chaincode invocation. That HTML page includes "/web/script/test.js" which contains the business logic. If you want to use this HTML page, you will need to update the source code in two places.
- The first is changing the "Test.URL" value in "/web/script/test.js" to the validating peer value from the previous step.
- The second change is in "/web/test.html". Under the button labeled "Deploy Chaincode" (roughly line 21), the value of the HTML input field with the ID of "chaincode" needs to be updated to reflect the chaincode ID from the deployment step.
In order for the web-based to-do list application to work, it must be run from a web server. This server does not need to be publicly available in order for the application to function. On Mac, a common approach is to use the built-in PHP installation to run an in-place web server.
At the command line, navigate to the "/web" directory. Launch the PHP web server in-place.
php -S localhost:8081IBM Blockchain supports cross-origin resource sharing (CORS). The result is that the browser can communicate directly to IBM Blockchain without the need for a proxy server.
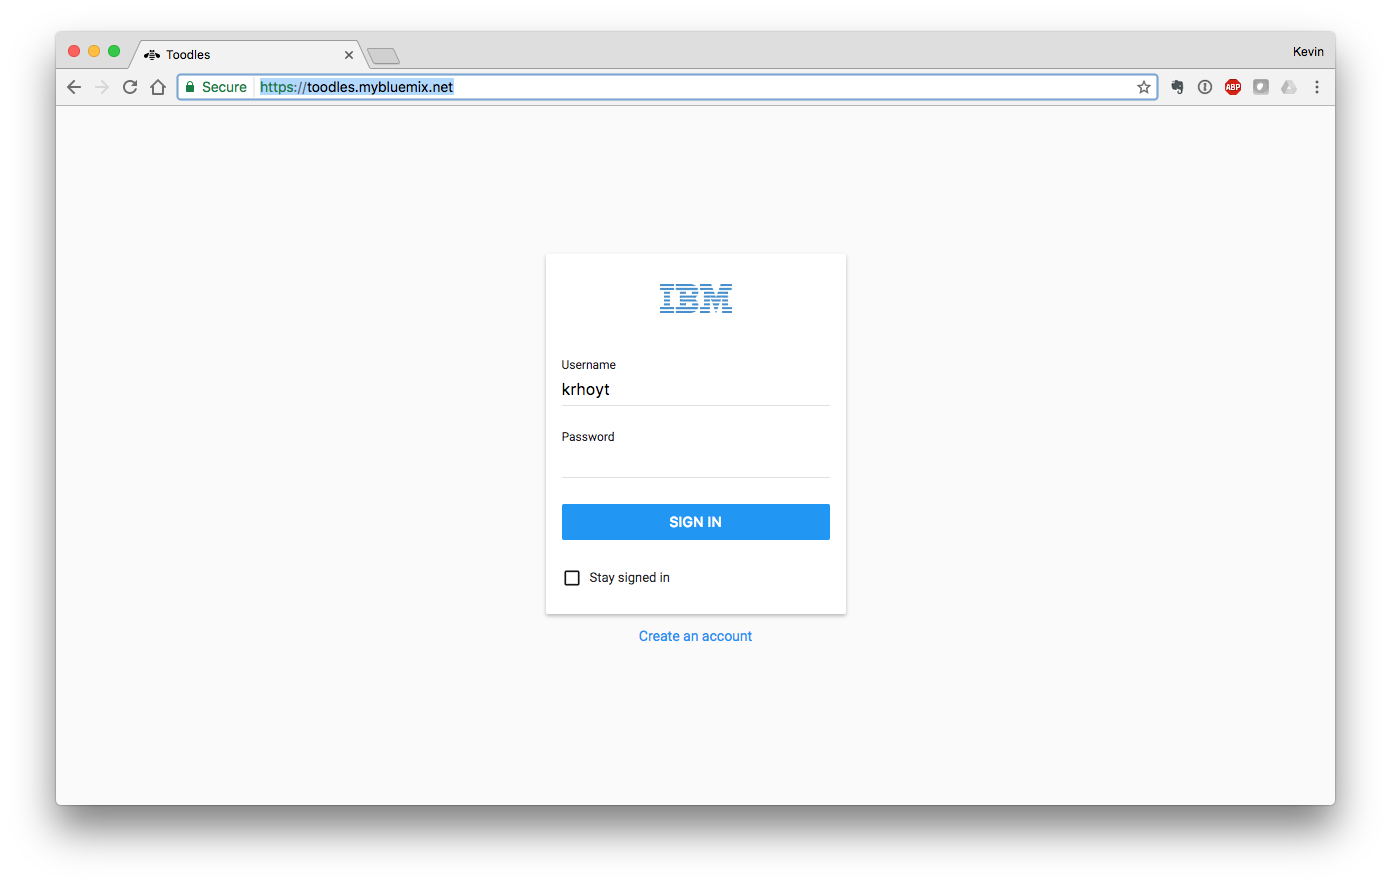
With the web application loaded into the browser, you will first be presented with a login screen. The login dialog contains an IBM logo. Alt+Click on that logo to preload data into the blockchain. The only indication that this operation has been completed is a transaction ID in the developer console.
While not extremely verbose, transaction IDs from IBM Blockchain are presented in the developer console of the browser for every change made at the blockchain itself. It may be useful to have the developer console open when you are using the to-do list application.
There are three accounts created in the default data. In the form of username:password, those accounts are ...
- krhoyt:abc123
- abtin:abc123
- peter:abc123
You can login with any of these accounts to browse, read, edit, add, and delete to-do items.
- To create a to-do list item, click on the red button labeled "+". Hovering over this button will present the additional button to create a "location".
- To edit a to-do list item, click on the item you are interested in editing and modify the fields to match your desired values. There is no "save" button as all changes are immediately committed to the blockchain.
- To delete a to-do list item, move your mouse over any item, and click on the trash can icon.
- To forward the to-do list item to another person, move your mouse over any item and click on the arrow icon that appears. A list of other users in the system will be presented. Select a name.
- To logout of the application, click the icon that is a box with an arrow inside of it. This is located in the upper-righthand corner of the screen.
- Using the above account information, log into the application again using a different account to see to-do items forwarded on to other users in the system.
The developer console in the browser is your key to troubleshooting any problems that may arise. The first place to look for errors is in checking the values of the chaincode ID and validating peer in the "/web/script/blockchain.js" file.
